Editorial
For many smaller companies and organizations, operating system deployment is always a small to medium problem. Some use the pre-installed operating system, some install by hand, others clone the hard drives and a few use other tools. There are many methods and reasons. I compare the different methods and a few tools in the article “Possibilities of computer installations for companies“.
One reason against tools and professional programs are mostly the costs. In this series of articles, I show you a free tool, but it requires a certain type of operating system licensing. More about this later.
Why do I do this? I often get requests from schools or non-profit organizations, as well as smaller companies that have this problem. Considering the situation of many of these organizations or companies, I would like to do something to help with know-how transfer.
This is part 1 of 3 of the series of articles on “Network Installation with the Microsoft Deployment Toolkit”.
What is the Microsoft Deployment Toolkit (MDT)?
The Microsoft Deployment Toolkit, MDT for short, is a free tool from Microsoft. It provides the basis for the operating system installation of Microsoft System Center Configuration Manager (SCCM) and other third-party tools for operating system installation. The Microsoft Deployment Toolkit (MDT) can be used if the re-imaging rights have been acquired with the operating system. See the next chapter for more information. The Microsoft Deployment Toolkit (MDT) can be used to create so-called task sequences. Within these task sequences different tasks can be performed, more than with a customized Unattendent.xml.
Some examples of tasks / settings that can be done in a task sequence:
- Hard disk partitioning (by querying also with different layout, depending on BIOS or UEFI usage)
- Installation of the operating system (server operating system and client operating system)
- Injection of Driver Packages (Automatic or based on Windows Management Instrumentation (WMI) queries
- Encrypt the hard disk with BitLocker
- Installing Microsoft Updates
- Import of license information
- Installation of software
- Joining to a Windows domain
- Run BIOS, firmware or TPM modules upgrades, if supported by the vendor
- Execution of programs and PowerShell scripts
Actually there is almost nothing that cannot be solved in a task sequence.
If the task sequence has been created correctly, it can be used on the computers using various methods:
- Installation via network boot
- Installation via boot media and network download (ISO or USB)
- Installation via an offline medium (ISO or USB)
In most cases I prefer the network start via a Windows Deployment Server, but more about that later.
Remark to Re-imaging rights
Depending on the Windows licenses purchased, the right of “re-imaging” is missing. This is necessary for most installations in this comparison. Please check if you are authorized to use these methods. I can’t give any license advice at this point because this subject area is constantly changing. Microsoft has also published a “Licensing brief” on this topic, which deals with the topic in more detail. If in doubt, please ask your license distributor.
Limitations of Microsoft Deployment Toolkit (MDT)
As stated in the name of the Microsoft Deployment Toolkit (MDT), it is about the distribution of an operating system image, not about its maintenance. So, if the operating system and possibly other software has been distributed, MDT can no longer maintain those deployed images and software it. This is one of the big differences between Microsoft SCCM or other third-party tools.
Many applications today come with their own update capabilities, such as Adobe Acrobat Reader, Google Chrome and Mozilla Firefox. With these, the update can be controlled via Group Policy extensions, for example. But also, many OpenSource applications now have their own update routines.
Another limitation is that only Intel-based (X86 and X64) Microsoft operating systems can be distributed with the Microsoft Deployment Toolkit (MDT). Linux or ARM64 versions of Microsoft Windows are not supported.
Scenario in this article series
For this series of articles, I assume a smaller environment with Active Directory. All systems get their updates directly from the internet, there is no separate Windows Server Update Service (WSUS). The installation of the distribution system and all necessary components is done on a dedicated server. My environment consists of 4 virtual machines: A domain controller ADC001H, the WDS/MDT server WDS001H, and 2 VMs for the clients. I use one of them to create your base image, more about this later. The WDS server has 2CPU cores and 4GB memory and is installed on Windows Server 2019. The server WDS001H is a member of the domain.
Planning the Microsoft Deployment Toolkit (MDT) Server
To use the Microsoft Deployment Toolkit (MDT), the Windows Assessment and Deployment Kit (Windows ADK) is required. This can be downloaded for free from Microsoft.
Requirements for Microsoft Deployment Toolkit (MDT)
Microsoft recommends using the PowerShell version 5.1, minimum requirement is version 3.0. The Microsoft PowerShell version 5.1 is already included in Windows Server 2016 / 2019. These are also the server operating systems on which I would install the MDT, since both are based on Windows 10.
Another requirement is an installed Microsoft .Net Framework in version 4.0 or higher.
The MDT also needs the “Windows Assessment and Deployment Kit” (Windows ADK) and the appropriate “Windows Preinstallation Environment” (PE). The Windows ADK and the appropriate Windows Preinstallation Environment (WinPE) is available for every version of Windows. So, this should also be updated for a new Windows release.
Installation of the WADK
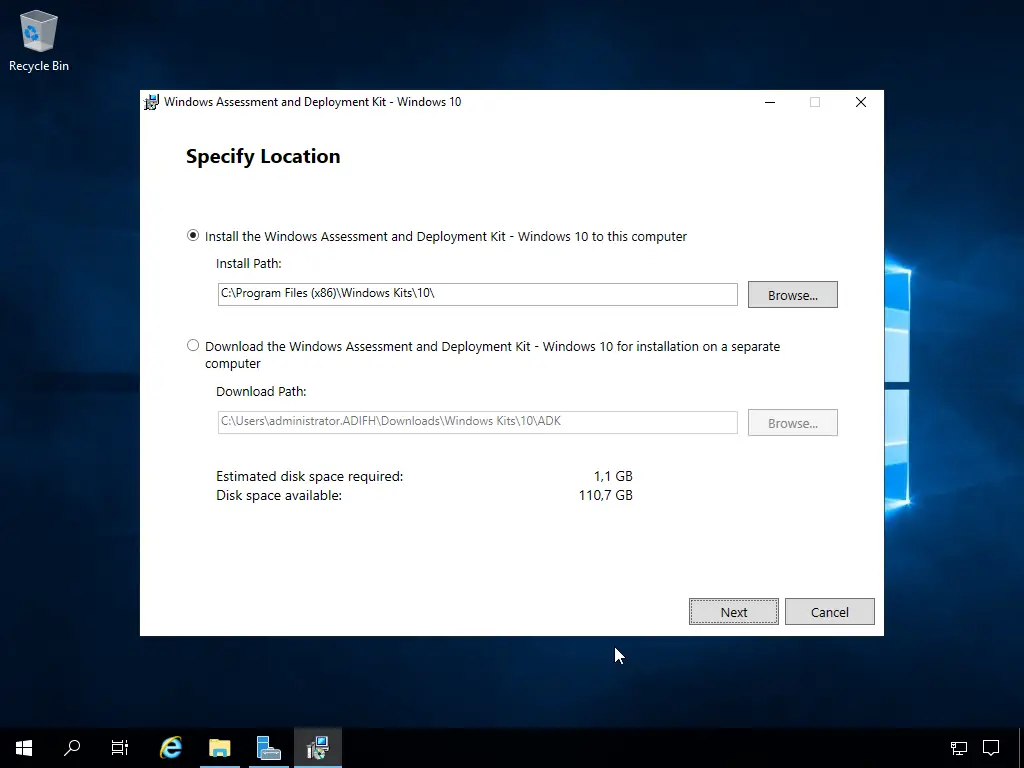
After starting the installation program, the target path must be selected. Here you also have the possibility to download the installation files for later or offline use.
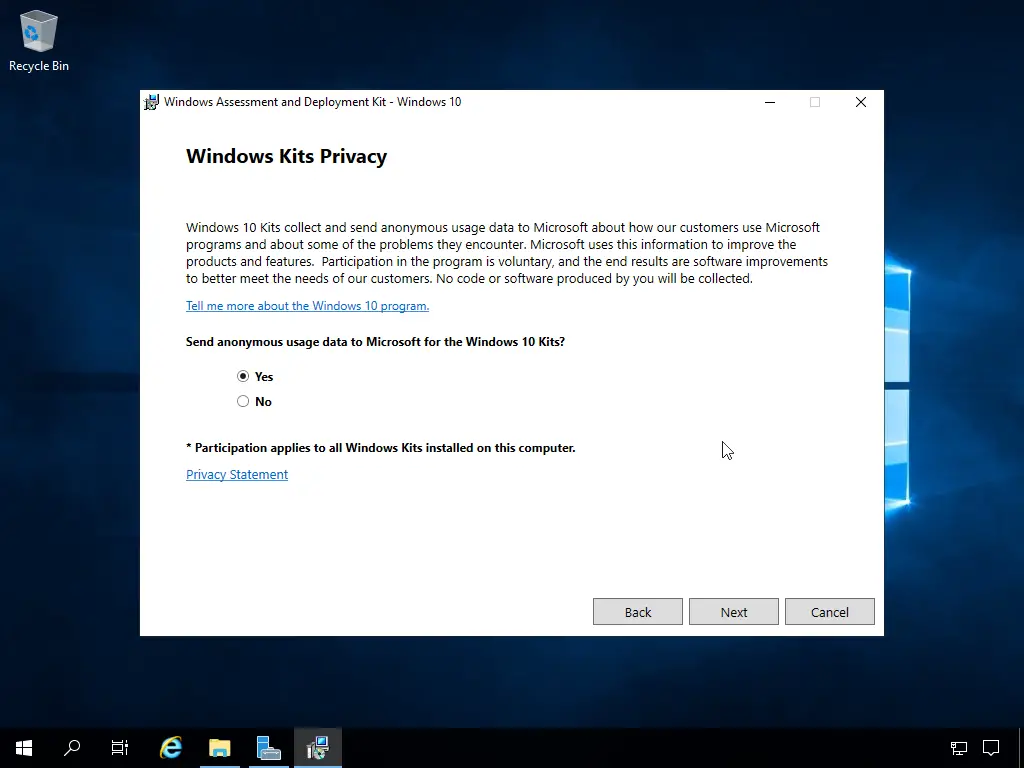
Those who choose to support Microsoft may submit anonymous usage data to Microsoft for product improvement.
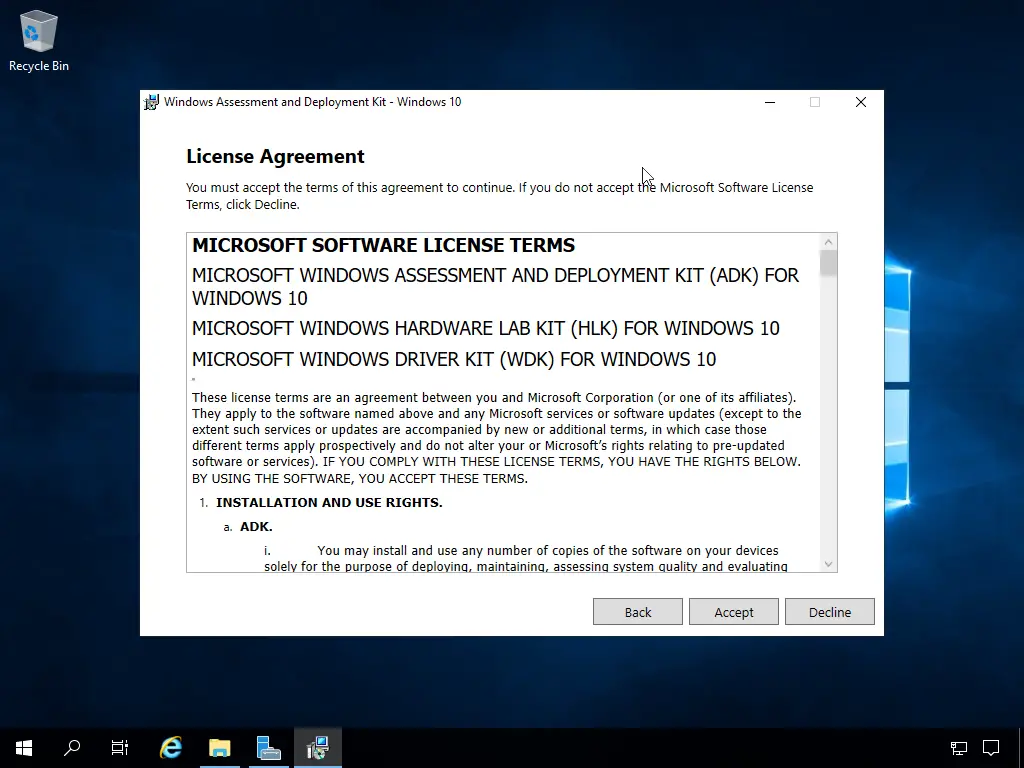
The next step are the license terms
The following function selection requires the “Deployment Tools” and the “Configuration Designer”. To migrate user data, the “User State Migration Toolkit (USMT)” should also be installed.
![Network installation with the Microsoft Deployment Toolkit - Part 1: Guidelines, preparation and setup 7 Computergenerierter Alternativtext:
Recycle Bin
Windows Assessment and Deployment Kit - Windows 10
Select the features you want to install
Click a feature name for more information.
Application Compatibility Tools
Deployrnent Tools
Imaging And Configuration Designer (ICD)
g] Configuration Designer
g] User State Migration Tool (USMT)
Volume *oztivation Management Tool {VAMT)
Windows Performance Toolkit
Microsoft Llser Experience Virtualization (LIE-V) Template (
Microsoft Application Virtualization (App-V) Sequencer
Microsoft Application Virtualization (App-V) Auto Sequer(
Media eXperience Ana'yzer
Wndows IP Over LISB
Deployment Tools
Size. 91,4 MB
Tools to customize and manage Windows images and to
automate installation.
Includes:
Deployment Image Serv'icing and Management
(DISM) tool. To use DISM cmdlets, PowerSheII 3.0
must also be installed.
OEM Activation 2.5 and Tools.
Windows System Image Manager (SIM).
OSCDIMG, 8CDBoot DISMAPI, WIMGAPI, and ather
tools and interfaces.
Estimated disk space required:
Disk space available:
Back
Install
7526 MB
110,7 GB
Cancel](https://www.infrastructureheroes.org/wp-content/uploads/2020/10/computergenerierter-alternativtext-recycle-bin-w-3.png)
Now is time for a coffee…
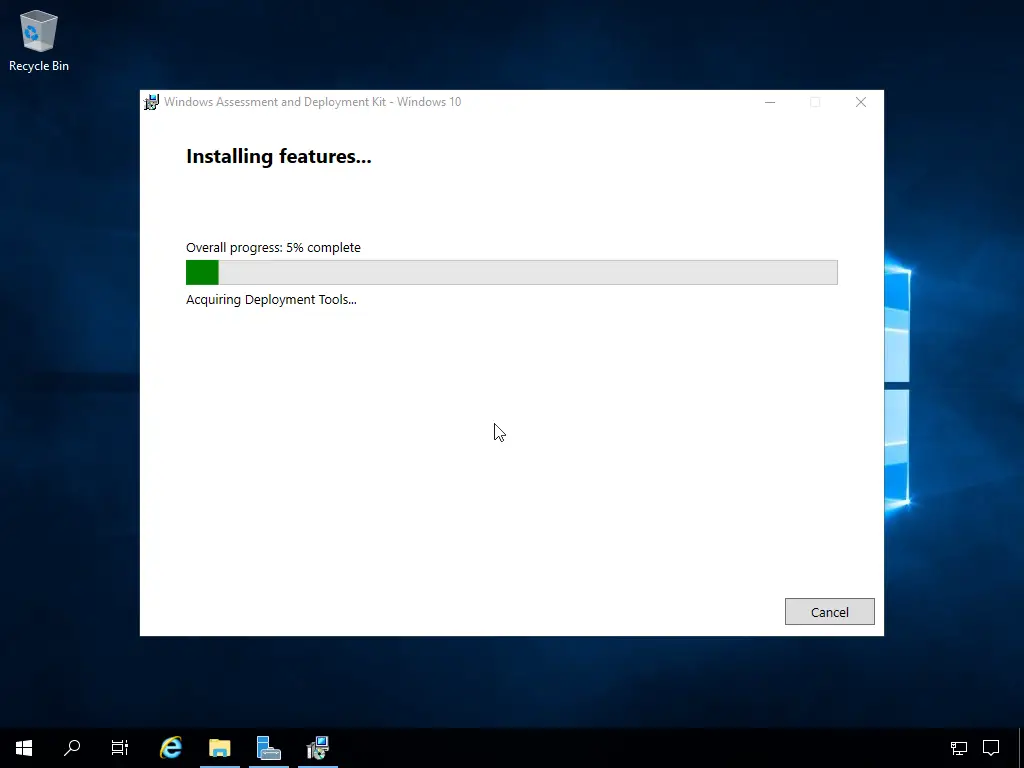
After that the installation is complete

Installation of the WADK PE
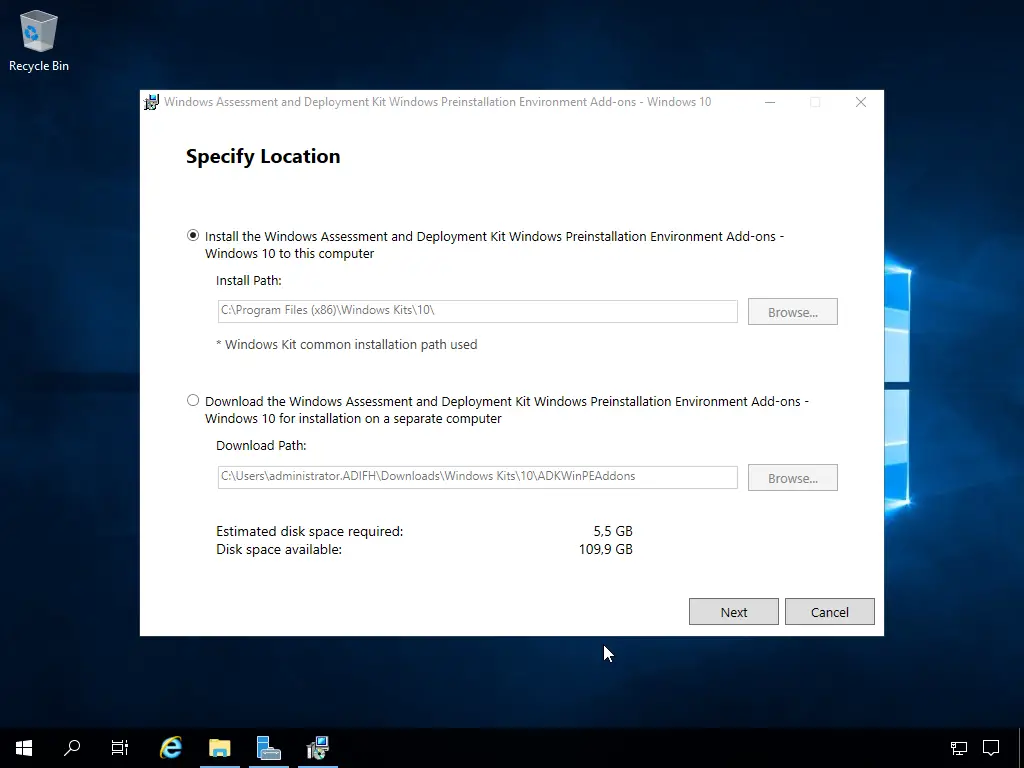
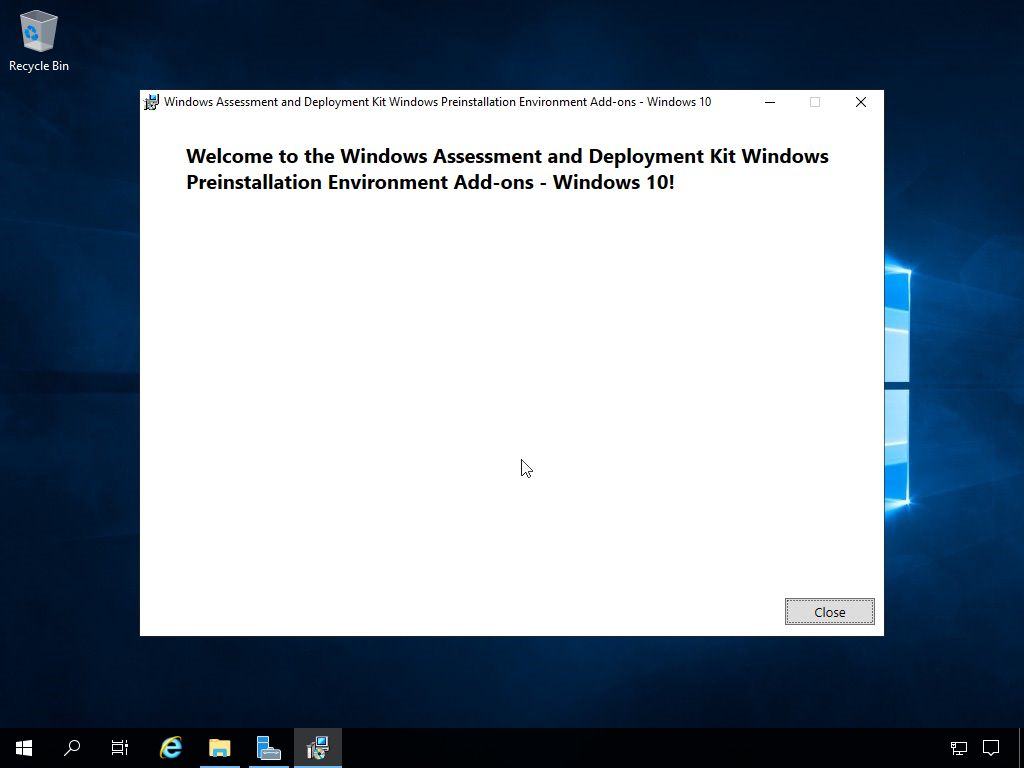
After the “Windows Assessment and Deployment Kit” (Windows ADK / WADK) is installed, the “Win PE” extension is required. Win PE stands for “Windows Preinstallation Environment”, the installation environment before the actual Windows is started. The installation is as simple as the installation of the WADK. Again, the installer offers the possibility to install the software directly or just download it.
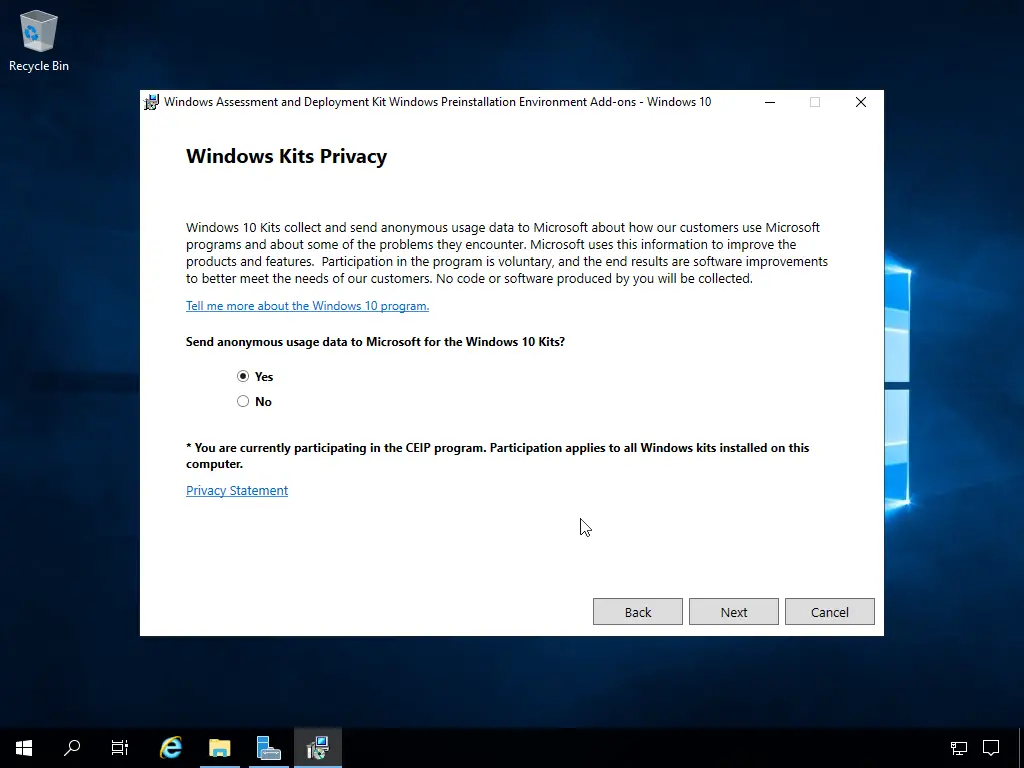
As with the WADK, you also have the possibility to provide Microsoft with the usage data.
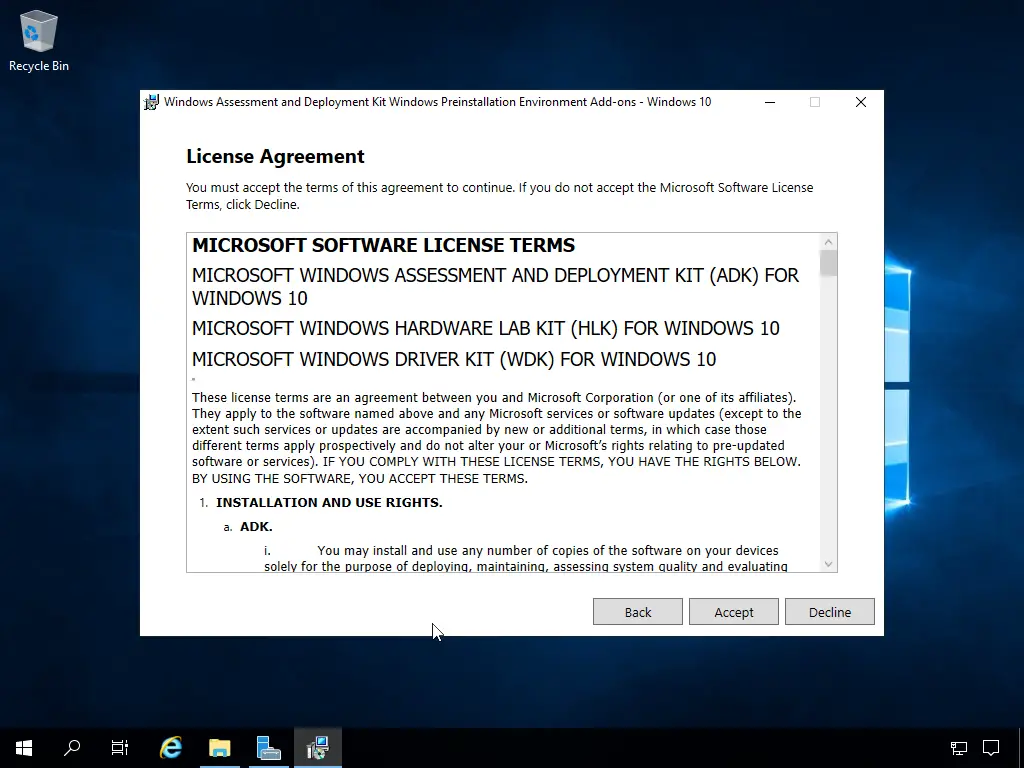
To continue you must accept the license agreement
There is only one feature of the Windows Preinstallation Environment extension.
![Network installation with the Microsoft Deployment Toolkit - Part 1: Guidelines, preparation and setup 13 Computergenerierter Alternativtext:
Recycle Bin
Windows Assessment and Deployment Kit Windows Preinstallation Environment Add-ans - Windows 10
Select the features you want to install
Click a feature name for more information.
g] Windows Preinstallation (VVindows PE)
Windows Preinstallation Environment
(Windows PE)
Size.
Minimal operating system designed to prepare a computer
for installation and servicing of Windows
Includes:
• Windows PE (x86)
• Windows PE
• Windows PE (ARM)
• Windows PE (ARM64)
Estimated disk space required:
Disk space available:
Back
Install
109,9 GB
Cancel](https://www.infrastructureheroes.org/wp-content/uploads/2020/10/computergenerierter-alternativtext-recycle-bin-w-6.png)
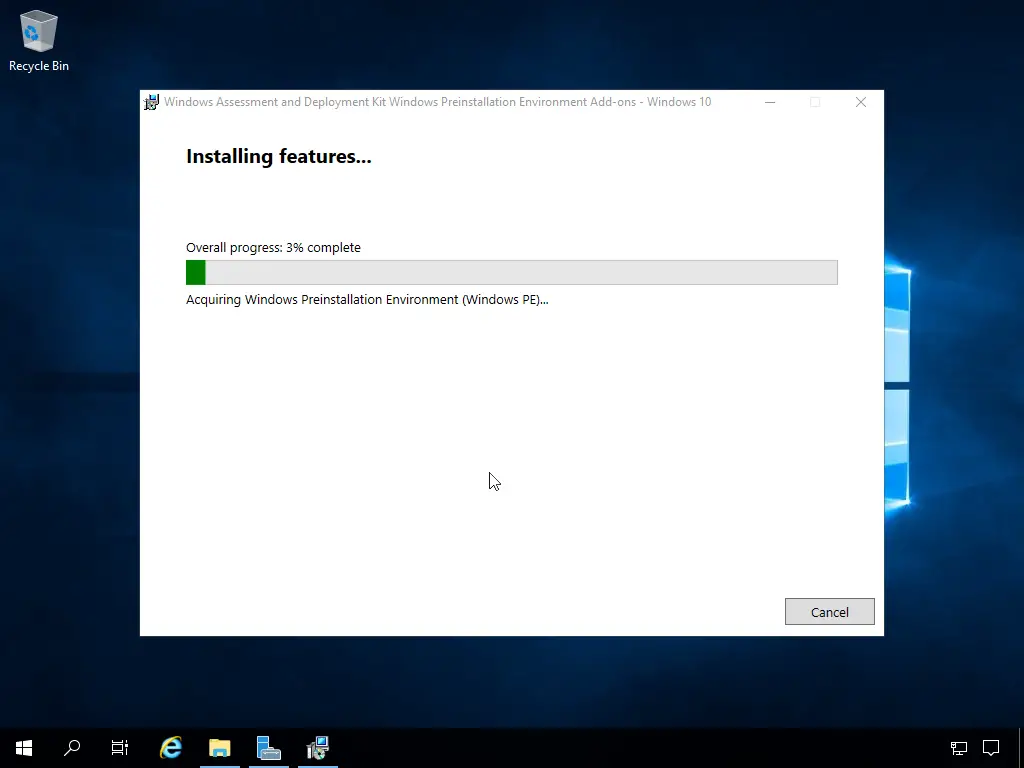
The speed depends on the download speed but takes some time even with a 100Mbit internet connection.
After the installation is complete, you can continue with the next step.
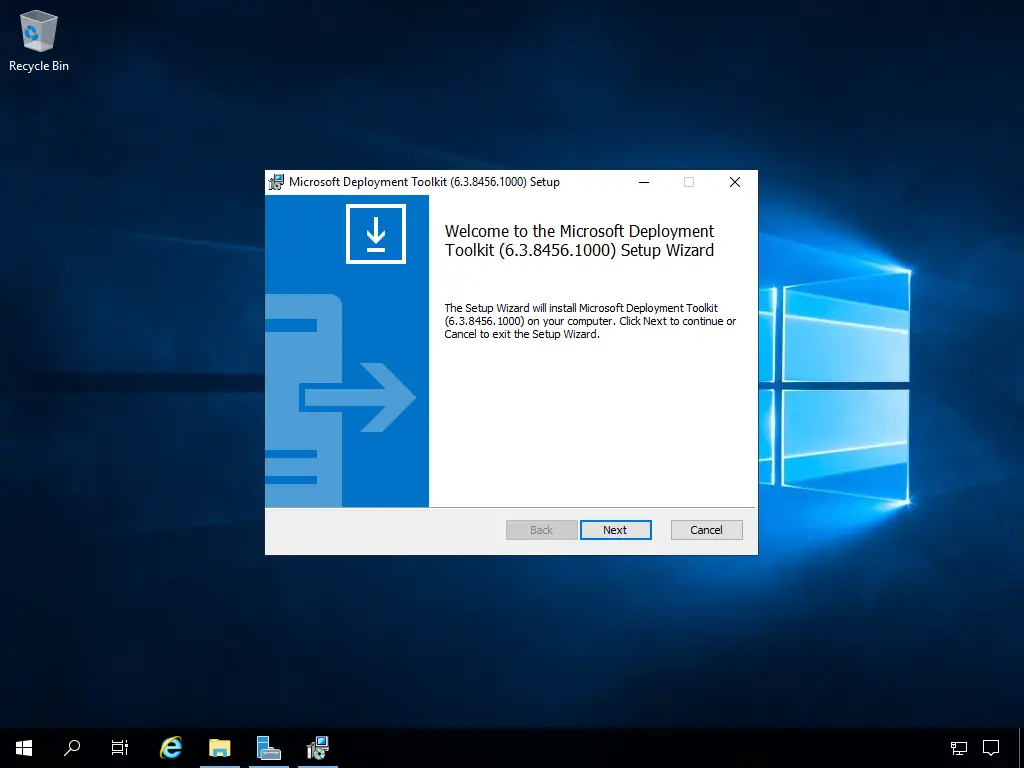
Installation of the Microsoft Deployment Toolkit (MDT)
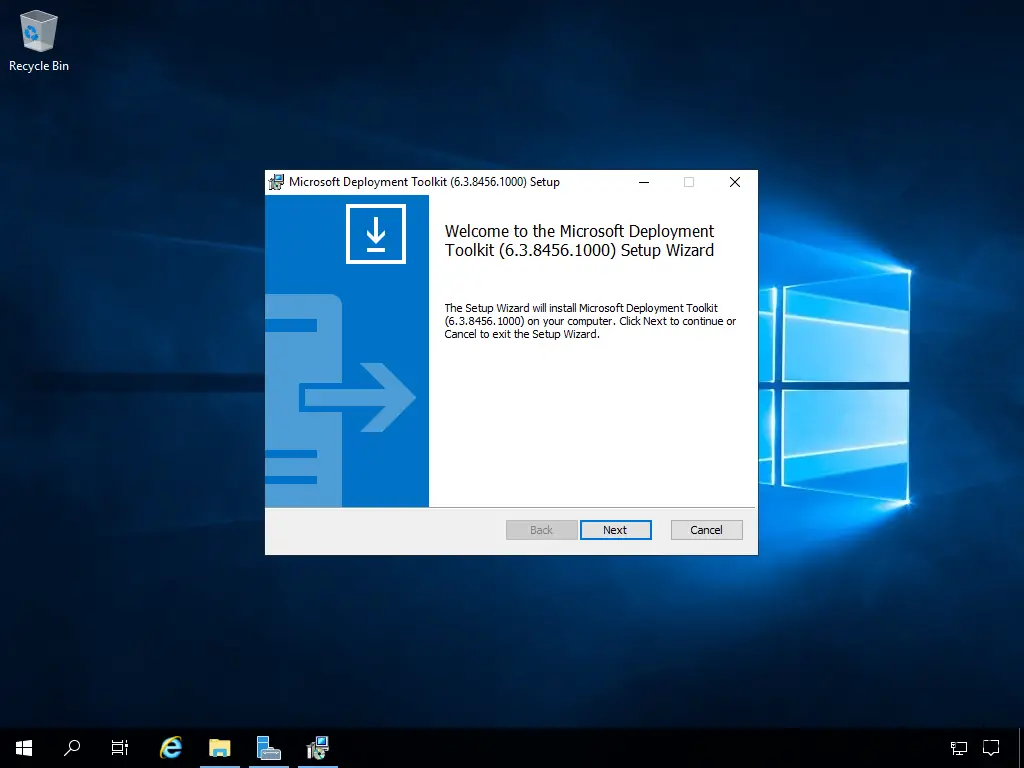
The actual installation of the Microsoft Deployment Toolkit (MDT) is also kept simple.
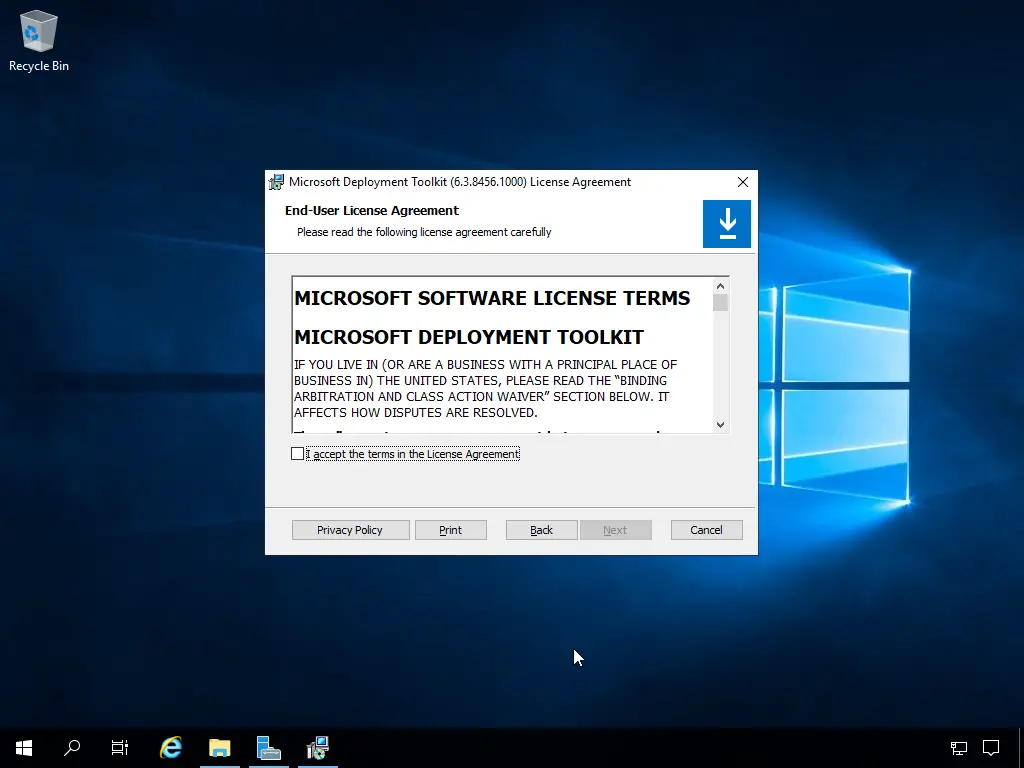
To continue you must agree to the license terms.
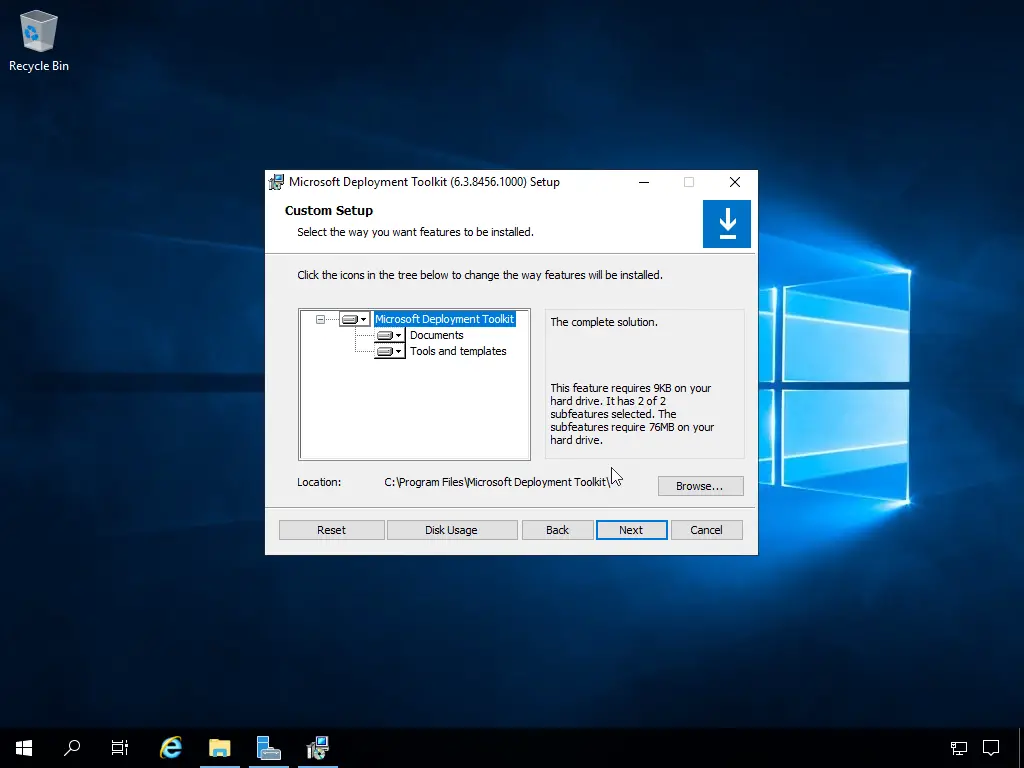
You do not need to change anything when selecting the functions.
You can again join the Customer Experience Improvement Program
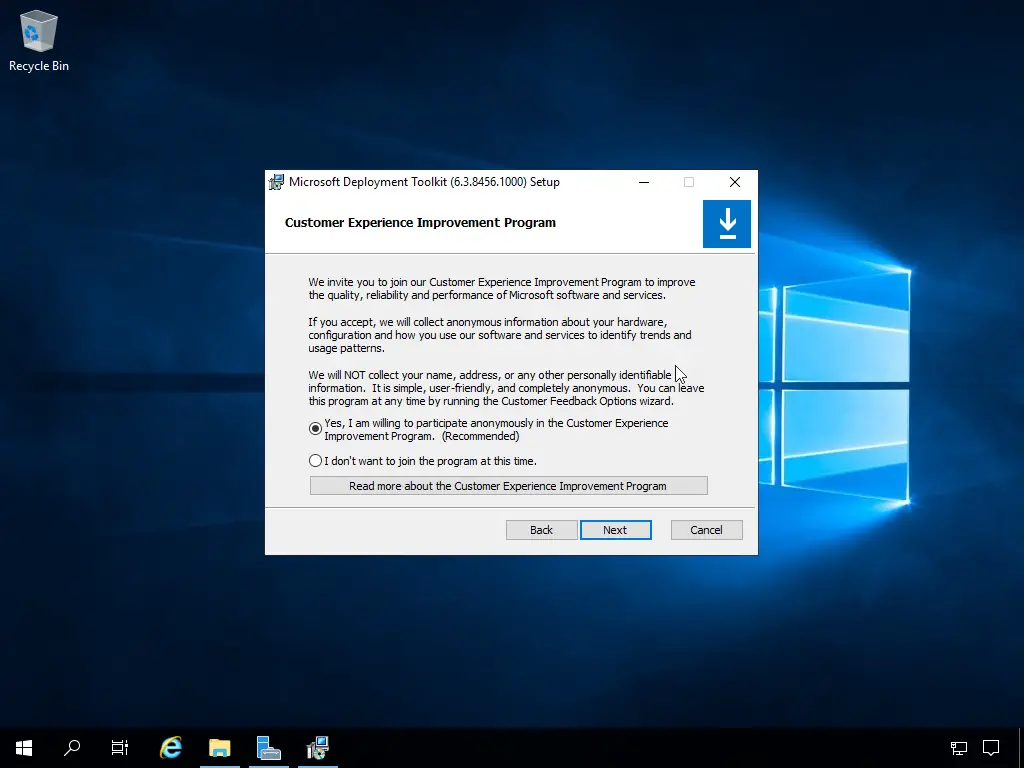
Now the actual installation takes place.
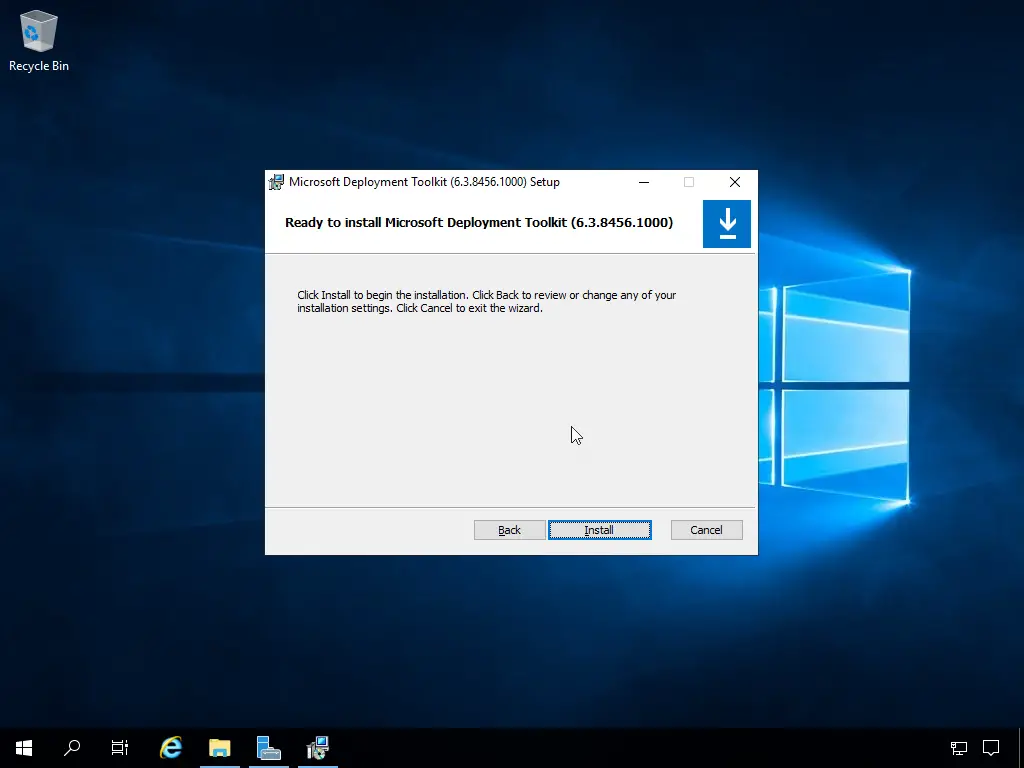
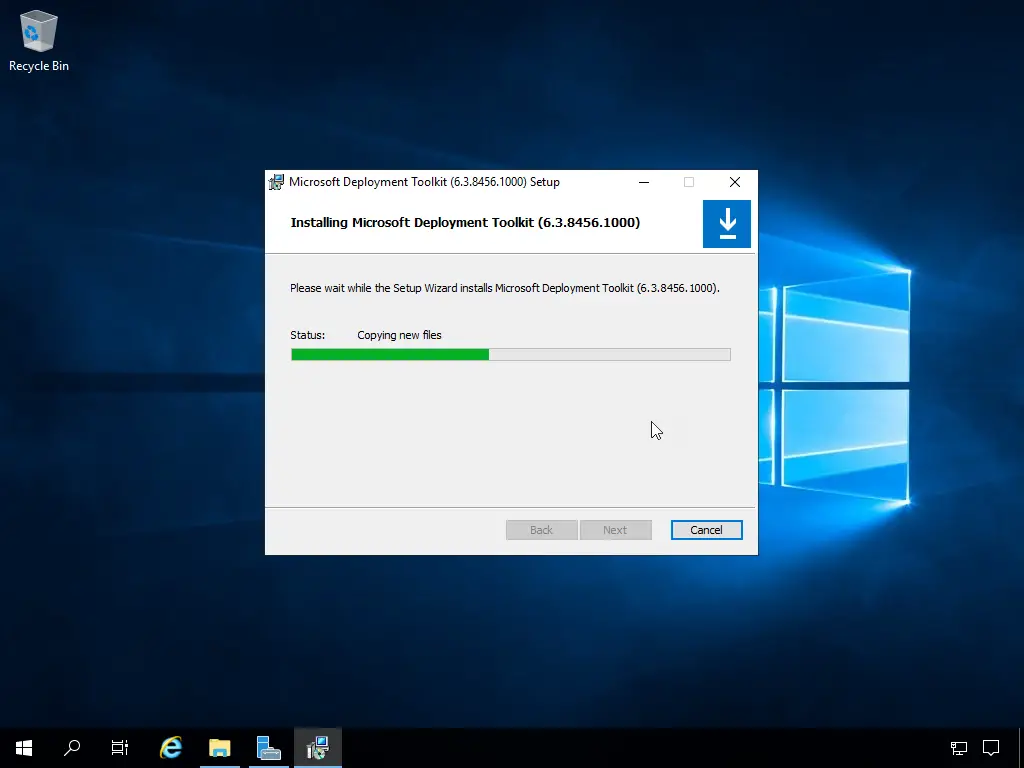
This does not take long
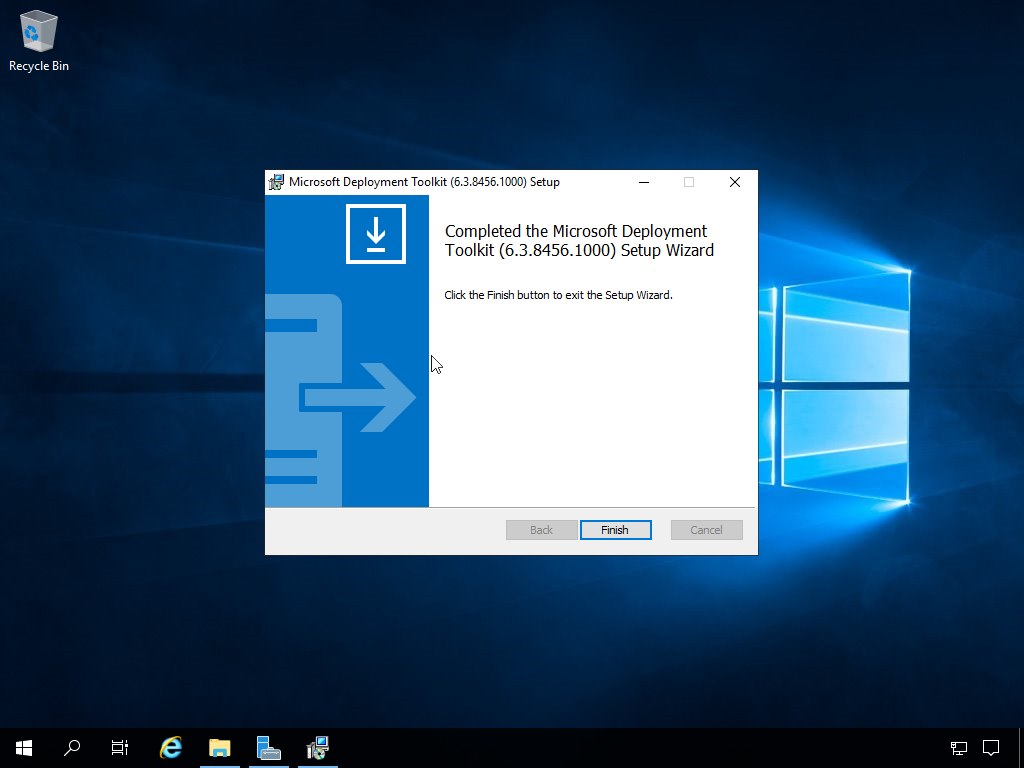
The installation is now complete
Setting up the Microsoft Deployment Toolkit (MDT)
The Microsoft Deployment Toolkit (MDT) works with so-called “Deployment Shares”. All MDT parts are stored in the Deployment Share. For example: Task sequences, driver packages, Windows images, applications, configurations and everything else that belongs to the MDT. Multiple Deployment Shares can be managed per installation.
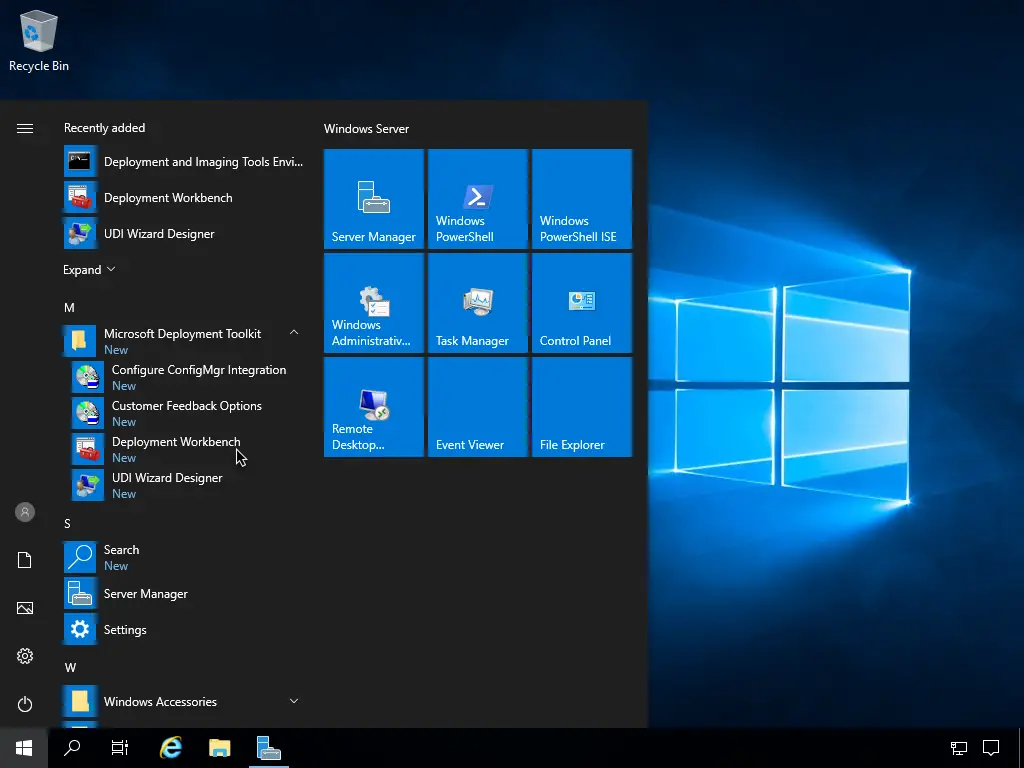
Start the “Deployment Workbench”, this is the main MDT console.
The deployment shares can be managed in this console.
![Network installation with the Microsoft Deployment Toolkit - Part 1: Guidelines, preparation and setup 24 DeploymentWorkbench - [Deployment Workbench]
File Action View Help
Deployment Workbench
Information Center
Deployment Shares
Done
Microsoft Deployme
Microsoft Deployment Toolkit Overview
The Microsoft Deployment Toolkit (MDT) provides a unified collection of tools, pmcesses,
guidance for automating desktop and server deployments. In addition to reducing deployn
and standardizing desktop and server images, MDT offers improved security and ongoing
configuration management.
MDT supports deployment of Windows 10 through Windows 7, as well as the associated se
embedded operating systems. Features such as Windows 10 in-place upgrade, flexible drÅ
management, optimized user interface workflow, and Windows PowerSheII scripting can si
deployment and make your job easier. Deploy faster and easier with MDT.
What's New in MDT
• Support for the Windows Assessment ana Deployment Kit (ADK) for Windows 10
• Support for deployment and upgrade of Windows 10
• Support for integration with System Center Configuration Manager with the Wind0%
a
View
Refresh
Help
Resources
MDT Documentation
MDT Team
MDT @ Windows TechNet
htto://www.microsoft.com/deolovment
2015 All Rlgh](https://www.infrastructureheroes.org/wp-content/uploads/2020/10/deploymentworkbench-deployment-workbench-file.png)
Since the MDT has been reinstalled, a new deployment share must be created.
![Network installation with the Microsoft Deployment Toolkit - Part 1: Guidelines, preparation and setup 25 Computergenerierter Alternativtext:
DeploymentWorkbench - [Deployment Workbench\DepIoyment Shares]
File Action View Help
Deployment Workbench
Information Center
Deployment Shares
Create a new deploy share
There are no items to show in this view.
ment Shar
New Deployment Share
Open Deployment Share
a
Refresh
Export List...
Help](https://www.infrastructureheroes.org/wp-content/uploads/2020/10/computergenerierter-alternativtext-deploymentwork.png)
In a productive environment I would put the deployment share on a separate disk partition. Due to updates and forgotten clean-up the shares might tend to grow a lot if you are not careful.
![Network installation with the Microsoft Deployment Toolkit - Part 1: Guidelines, preparation and setup 26 DeploymentWcrkbench - [Deployment Workbench\DepIcyment Shares]
File Action View Help
New Deployment Share Wizard
Deployment Workben
Information Center
Deployment Shares
Path
Specify the location of the network share for this deployment type
nt Shar
ew Deployment Share
pen Deployment Share
efresh
pot List...
Share
Descriptive Name
Options
Summary
Progress
Deployment share path
Previous
Create a new deploy share](https://www.infrastructureheroes.org/wp-content/uploads/2020/10/deploymentwcrkbench-deployment-workbench-depicy.png)
It is best to release the share as hidden share.
![Network installation with the Microsoft Deployment Toolkit - Part 1: Guidelines, preparation and setup 27 DeploymentWcrkbench - [Deployment Workbench\DepIcyment Shares]
File Action View Help
New Deployment Share Wizard
Deployment Workben
Information Center
Deployment Shares
Share
Path
Share
Descriptive Name
Options
Summary
Progress
Create a new deploy share
Specify the share name to be used with the specified local path f the share already exists on this
computer. it must point to the path specified for this deployment share
nt Shar
ew Deployment Share
pen Deployment Share
efresh
pot List...
Share name:
Full path LINC path
CJS 001 H \DepIoyment ShareS](https://www.infrastructureheroes.org/wp-content/uploads/2020/10/deploymentwcrkbench-deployment-workbench-depicy-1.png)
Then the share needs a suitable name.
![Network installation with the Microsoft Deployment Toolkit - Part 1: Guidelines, preparation and setup 28 Computergenerierter Alternativtext:
DeplcymentWcrkbench - [Deplcyment Workbench\DepIcyment Shares]
File Action View Help
New Deployment Share Wizard
Deployment Workben
Information Center
Deployment Shares
Descriptive Name
nt Shar
ew Deployment Share
pen Deployment Share
efresh
pot List...
Share
Descriptive Name
Options
Summary
Progress
Specify a descnptive name for the deployment Share
MOT De Ionent Shate
Create a new deploy share](https://www.infrastructureheroes.org/wp-content/uploads/2020/10/computergenerierter-alternativtext-deplcymentwcrk.png)
I leave the settings for now, they can be changed later if necessary.
![Network installation with the Microsoft Deployment Toolkit - Part 1: Guidelines, preparation and setup 29 Computergenerierter Alternativtext:
DeplcymentWcrkbench - [Deplcyment Workbench\DepIcyment Shares]
File Action View Help
New Deployment Share Wizard
Deployment Workben
Information Center
Deployment Shares
Options
When performing deployments. the behavior of the Deployment Wizard can be customized by tuming
vahous Wizard panes on or off Forthosethat are not desired. modfythe defautts below as approphat&
nt Shar
ew Deployment Share
pen Deployment Share
efresh
pot List...
Descriptive Name
Options
Summary
Progress
Ask f a computer backup should bepeffomed
Ask for a product key
Ask to set the Bcal Administrator password
Z] Ask f an image should be captured
Z] Ask f Bit Locker should be enabled
These settings can be changed later by modifying the des defined for the deployment Share
Create a new deploy share](https://www.infrastructureheroes.org/wp-content/uploads/2020/10/computergenerierter-alternativtext-deplcymentwcrk-1.png)
A summary follows before the share is created.
![Network installation with the Microsoft Deployment Toolkit - Part 1: Guidelines, preparation and setup 30 Computergenerierter Alternativtext:
DeplcymentWcrkbench - [Deplcyment Workbench\DepIcyment Shares]
File Action View Help
New Deployment Share Wizard
Deployment Workben
Information Center
Deployment Shares
Summary
AI of the necessary details have been specified Pleasereview the Values Below
nt Shar
ew Deployment Share
pen Deployment Share
efresh
pot List...
Descriptive Name
Options
Summar,•
Progress
Details
Share Name
Ask about Backup
Ask for Product Key
D \DepIoyment Share
False
Deployment Sh areS
M DT Deployment Share
False
Ask for Admin Password
Ask about Image Capture True
Ask about 8itLocker
Click next to execute the requested action
Create a new deploy share](https://www.infrastructureheroes.org/wp-content/uploads/2020/10/computergenerierter-alternativtext-deplcymentwcrk-2.png)
Then some patience is needed.
![Network installation with the Microsoft Deployment Toolkit - Part 1: Guidelines, preparation and setup 31 Computergenerierter Alternativtext:
DeplcymentWcrkbench - [Deplcyment Workbench\DepIcyment Shares]
File Action View Help
New Deployment Share Wizard
Deployment Workben
Information Center
Deployment Shares
Progress
Copying "C \Program Files\Microsoft Deployment
.inf" (0%)
Descriptive Name
Options
Summary
Progress
Confmation
oolkit \ScnptsVutorun H' ' to
nt Shar
ew Deployment Share
pen Deployment Share
efresh
pot List...
Creating Share 'DeploymentShareS With path
Share created successfully
Performing the operation "New dhve" on target "Name: DSOOI Pmvider MicrosoftDepIoyment ooIkit\MI
Performing the operation "nen" on target "deployment share"
Intializing a ne*' deployment Share
Intializing schpts and toole
Stop Execution
Create a new deploy share](https://www.infrastructureheroes.org/wp-content/uploads/2020/10/computergenerierter-alternativtext-deplcymentwcrk-3.png)
When the deployment share is created, the dialog can be closed with “Finish”.
![Network installation with the Microsoft Deployment Toolkit - Part 1: Guidelines, preparation and setup 32 Computergenerierter Alternativtext:
DeplcymentWcrkbench - [Deplcyment Workbench\DepIcyment Shares]
File Action View Help
New Deployment Share Wizard
Deployment Workben
Information Center
Deployment Shares
Confirmation
nt Shar
ew Deployment Share
pen Deployment Share
efresh
pot List...
Descriptive Name
Options
Summary
Progress
Confimnation
The Process completed successfully
Zreating Share 'DeploymentShareS With path
Share created successfully
Performing the operation "New dhve" on target "Name: DSOOI Pmvider MicrosoftDepIoyment ooIkit\MI
Performing the operation "nen" on target "deployment share"
Initializing a ne*' deployment Share
Intializing schpts and
Pefomning the operation "open" on target "deployment share"
Deployment Share at opened successfully
Adding MOT dive DSOOI to the persisted dive list
Successfully added MDT dive DSOOI to the peßisted dnvelist
Sa ve Output
Previous
View Script
Cancel
Create a new deploy share](https://www.infrastructureheroes.org/wp-content/uploads/2020/10/computergenerierter-alternativtext-deplcymentwcrk-4.png)
Adding operating systems
MDT supports different versions of Microsoft Windows Client and Windows Server. Please note new version of Windows 10 or Windows Server may require newer versions of MDT to work properly. So, if you want to integrate a new version or release of Windows, check if you need to update the MDT as well.
Please also consider which edition of Windows 10 you would like to use, see the article “Choosing the right Windows 10 edition” for help.
For the next step, the operating system must be added. To do this select the action “Import Operating System” in the navigation branch “Operating Systems”.
![Network installation with the Microsoft Deployment Toolkit - Part 1: Guidelines, preparation and setup 33 DeploymentWorkbench - [Deployment Workbench\DepIoyment Shares\MDT Deployment Share Systems]
File Action View Help
Deployment Workbench
Information Center
v Deployment Shares
v MDT Deployment Share
Applications
Operating Systems
Out of-Box Drivers
Packages
Task Sequences
Advanced Configuration
Monitoring
Import an operating system image or source files
Description
There are no items to show in this view.
Platfol
Actions
rating Syste
Import Operating Syst...
a
New Folder
Refresh
Export List...
Help](https://www.infrastructureheroes.org/wp-content/uploads/2020/10/deploymentworkbench-deployment-workbench-depioy.png)
I always recommend the ISOs from Microsoft’s Volume Licensing Portal for use with MDT.
![Network installation with the Microsoft Deployment Toolkit - Part 1: Guidelines, preparation and setup 34 DeploymentWcrkbench - [Deployment Workbench\DepIcyment Shares\MDT Deployment Share Systems]
File Action View Help
Import Operating System Wizard
Deployment Workben
Information Center
v Deployment Shares
v MDT Deployme
Applicatio
Operating
Out of-Box
Packages
Task Seque
Advanced C
Monitoring
OS Type
ng Syste
pot Operating Syst..
Folder
efresh
pot List...
OS
Source
Image
Setup
WDS Server
Destination
Summary
Progress
Choose the type of operating system to add
@ Full set of source files
The operating system being added consists of source files from a Windows DVD CD. or equivalent
C) Custom image file
Add a captured image (WIM file) that you wish to deploy
C) Windows Deployment Services images
Add the images available on a specific Windows Deployment Services server
Previous
Import an operating system image or source files](https://www.infrastructureheroes.org/wp-content/uploads/2020/10/deploymentwcrkbench-deployment-workbench-depicy-2.png)
To import the image into the WDS, mount the ISO or unpack it into a directory.
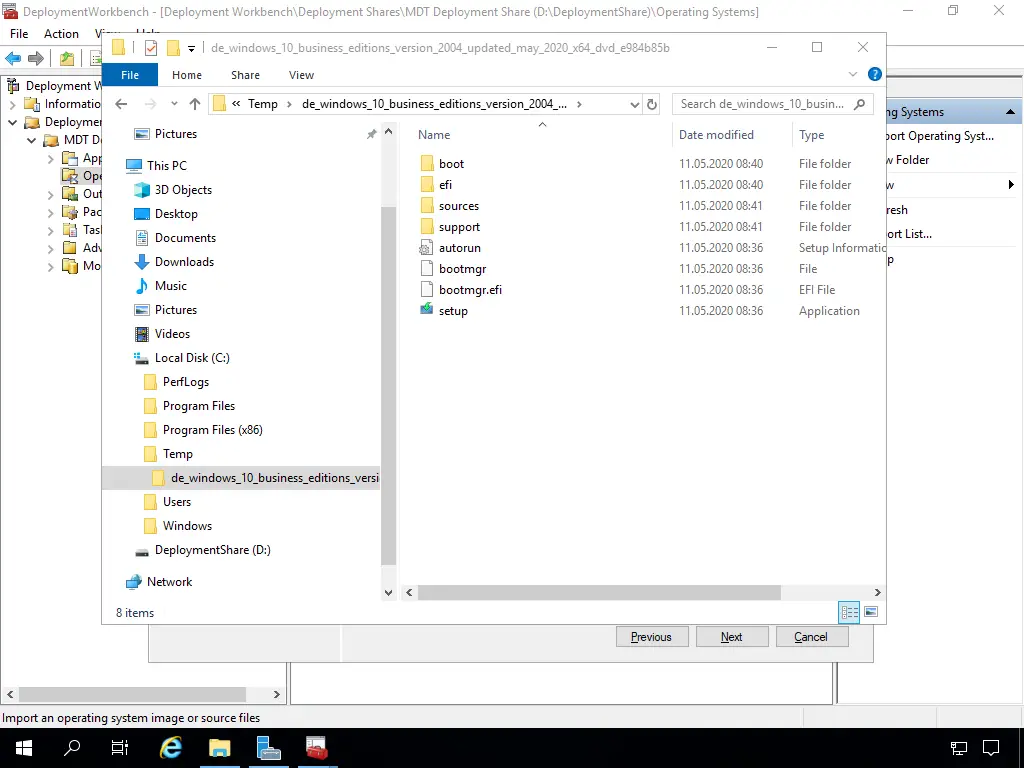
Specify a location in the dialog box. Please note that depending on the permissions, problems may occur when accessing via UNC paths.
![Network installation with the Microsoft Deployment Toolkit - Part 1: Guidelines, preparation and setup 37 DeploymentWcrkbench - [Deployment Workbench\DepIcyment Shares\MDT Deployment Share Systems]
File Action View Help
Import Operating System Wizard
Deployment Workben
Information Center
v Deployment Shares
v MDT Deployme
Applicatio
Operating
Out of-Box
Packages
Task Seque
Advanced C
Monitoring
Source
OS Type
Image
Setup
WDS Server
Destination
Summary
Progress
In order to add an operating system all the files for that operating system need to be copied to the
deployment share Specify the location of these files typically a CD dive)
Move the files to the share instead of copying theny
ng Syste
pot Operating Syst..
Folder
efresh
pot List...
Import an operating system image or source files](https://www.infrastructureheroes.org/wp-content/uploads/2020/10/deploymentwcrkbench-deployment-workbench-depicy-4.png)
In the next step you must define a target name for the image to be imported. This should clearly describe the source to avoid confusion.
![Network installation with the Microsoft Deployment Toolkit - Part 1: Guidelines, preparation and setup 38 Computergenerierter Alternativtext:
DeplcymentWcrkbench - [Deplcyment Workbench\DepIcyment Shares\MDT Deployment Share Systems]
File Action View Help
Import Operating System Wizard
Deployment Workben
Information Center
v Deployment Shares
v MDT Deployme
Applicatio
Operating
Out of-80x
Packages
Task Seque
Advanced C
Monitoring
Destination
Specify the name of the directory that should be created for these operating system files
Destination directory name
DE Windows 10 Enterprise 2004 updated_may
ng Syste
pot Operating Syst..
Folder
efresh
pot List...
OS Type
Image
Setup
WOS Sen,er
Destination
Summary
Progress
Import an operating system image or source files](https://www.infrastructureheroes.org/wp-content/uploads/2020/10/computergenerierter-alternativtext-deplcymentwcrk-5.png)
Now follows a summary once again.
![Network installation with the Microsoft Deployment Toolkit - Part 1: Guidelines, preparation and setup 39 Computergenerierter Alternativtext:
DeplcymentWcrkbench - [Deplcyment Workbench\DepIcyment Shares\MDT Deployment Share Systems]
File Action View Help
Import Operating System Wizard
Deployment Workben
Information Center
v Deployment Shares
v MDT Deployme
Applicatio
Operating
Out of-80x
Packages
Task Seque
Advanced C
Monitoring
Summary
OS Type
Image
Setup
'NDS Server
Destination
Progress
AI of the necessary details have been specified Pleasereview the Values Below
ng Syste
pot Operating Syst...
Folder
efresh
pot List...
Details
OSType
O S Destin ation
O S Source
MoveOS
SOURCE
DE Windows 10 Enterprise 2004 updated_may
C 2004 updated_may
False
Click next to execute the requested action
Import an operating system image or source files](https://www.infrastructureheroes.org/wp-content/uploads/2020/10/computergenerierter-alternativtext-deplcymentwcrk-6.png)
And then the actual import process takes place.
![Network installation with the Microsoft Deployment Toolkit - Part 1: Guidelines, preparation and setup 40 Computergenerierter Alternativtext:
DeplcymentWcrkbench - [Deplcyment Workbench\DepIcyment Shares\MDT Deployment Share Systems]
File Action View Help
Import Operating System Wizard
Deployment Workben
Information Center
v Deployment Shares
v MDT Deployme
Applicatio
Operating
Out of-80x
Packages
Task Seque
Advanced C
Monitoring
Progress
ng Syste
pot Operating Syst...
Folder
efresh
pot List...
OS Type
Image
Setup
'NDS Server
Destination
Summary
Progress
Confmation
Copying 2020_x64
jnf" to Systems\DE Windows 10 Enterprise
2004 uodated mav 2020 x64 dvd\autorun.inf" 10%)
Performing the operation "import" on target "Operating system"
Stop Execution
Import an operating system image or source files](https://www.infrastructureheroes.org/wp-content/uploads/2020/10/computergenerierter-alternativtext-deplcymentwcrk-7.png)
Then a final output is made. Here you can see that all editions have been imported. Why did I name the source Enterprise during import?
![Network installation with the Microsoft Deployment Toolkit - Part 1: Guidelines, preparation and setup 41 Computergenerierter Alternativtext:
DeplcymentWcrkbench - [Deplcyment Workbench\DepIcyment Shares\MDT Deployment Share Systems]
File Action View Help
Import Operating System Wizard
Deployment Workben
Information Center
v Deployment Shares
v MDT Deployme
Applicatio
Operating
Out of-80x
Packages
Task Seque
Advanced C
Monitoring
Confirmation
ng Syste
pot Operating Syst...
Folder
efresh
pot List...
OS Type
Image
Setup
'NDS Server
Destination
Summary
Progress
Confimnation
The Process completed successfully
Performing the operation "import" on target "Operating system"
Creating nen tem named Windows 10 Qiucation in DE Windows 10 Enterprise 2004 updated_may 202
Creating ne*' tem named Windows 10 Education N in DE Windows 10 Enterprise 2004 updated_may_2
Creating ne*' tem named Windows 10 Enterprise in DE Windows 10 Enterprise 2004 updated_may 202
Creating ne*' tem named Windows 10 Pro in DE Windows 10 Enterprise 2004 updated_may 2020_x64
Creating nen tem named Windows 10 Pro N in DE Windows 10 Enterprise 2004 updated_may 2020_xE
Creating ne*' tem named Windows 10 Pro Education in DE Windows 10 Enterprise 2004 updated_may
Creating ne*' tem named Windows 10 Pro Education N in DE Windows 10 Enterprise 2004 updated_ma
Creating nen tem named Windows 10 Pro for Workstations in DE Windows 10 Enterprise 2004 updated
Creating ne*' tem named Windows 10 Pro N for Workstations in DE Windows 10 Enterprise 2004 updatf
Import Processing finished
Sa ve Output
Previous
View Script
Cancel
Import an operating system image or source files](https://www.infrastructureheroes.org/wp-content/uploads/2020/10/computergenerierter-alternativtext-deplcymentwcrk-8.png)
Quite simple, I will delete the rest to make it more manageable. I always recommend using a maximum of one edition of Windows 10 to make things easier.
![Network installation with the Microsoft Deployment Toolkit - Part 1: Guidelines, preparation and setup 42 DeploymentWorkbench - [Deployment Workbench\DepIoyment Shares\MDT Deployment Share Systems]
File Action View Help
Deployment Workbench
Information Center
v Deployment Shares
v MDT Deployment Share
Applications
Operating Systems
Out of-Box Drivers
Packages
Task Sequences
Advanced Configuration
Monitoring
Name
Windows 10 Education in DE Windows 10 Enterprise 2DC4 164 dvd install.wim
Windows 10 Education N in DE Windows 10 Enterprise 2DN x64 dvd install.wi
Windows 10 Enterprise in DE Windows 10 Enterprise xN_dvd install.wim
Windows 10 Enterprise N in DE Windows 10 Enterprise 2DC4 x64 dvd install.wi
Windows 10 Pro Education in DE Windows 10 Enterprise 2DD4 x64_dvd install.
Windows 10 Pro Education N in DE Windows 10 Enterprise 2DD4 updated_may_2020_x64_dvd install
Windows 10 Pro for Workstations in DE Windows 10 Enterprise 2DD4 x64_dvd i
Windows 10 Pro in DE Windows 10 Enterprise 2DD4 x64_dvd install.wim
Windows 10 Pro N for Workstations in DE Windows 10 Enterprise 2DD4 x64_dvd
Windows 10 Pro N in DE Windows 10 Enterprise 2Dtu install.wim
rating Syste
Import Operating Syst..
New Folder
Refresh
Export List...
Help
Selected It
Cut
copy
Deletes
Help](https://www.infrastructureheroes.org/wp-content/uploads/2020/10/deploymentworkbench-deployment-workbench-depioy-1.png)
I delete the not needed editions because of the better overview.
![Network installation with the Microsoft Deployment Toolkit - Part 1: Guidelines, preparation and setup 43 DeploymentWcrkbench - [Deployment Workbench\DepIcyment Shares\MDT Deployment Share Systems]
File Action View Help
Delete Selected Items
Deployment Workben
Information Center
v Deployment Shares
v MDT Deployme
Applicatio
Operating
Out of-Box
Packages
Task Seque
Advanced C
Monitoring
Deletes the current selection.
Options
Options
Summary
Progress
Confirmation
Please confirm that these should be deleted
Windows 10 Education in DE Windows 10 Enterprise 2004 updated_may 2020
Windows 10 Education N in DE Windows 10 Enterprise 2004 updated_may 202
Windows 10 Enterprise N In DE Windows 10 Enterprise 2004 updated_may 202
Windows 10 Pro Education n DE Windows 10 Enterprise 2004 updated_may 20
Windows 10 Pm Education N in DE Windows 10 Enterprise 2004 updated_may
Windows 10 Pm for Workstations in DE Windows 10 Enterprise 2004 updated_m
Windows 10 Pm In DE Windows 10 Enterprise 2004 updated_may
Windows 10 Pro N for Workstations in DE Windows 10 Enterprise 2004 updated
Windows 10 Pm N in DE Windows 10 Enterprise 2004 updated_may 2020_x64
Z] Completely delete these tems. even f there are copies in other folders (Force)
Previous
ng Syste
pot Operating Syst...
Folder
efresh
pot List...
elete](https://www.infrastructureheroes.org/wp-content/uploads/2020/10/deploymentwcrkbench-deployment-workbench-depicy-5.png)
As in almost every dialog in MDT I get a summary of the process.
![Network installation with the Microsoft Deployment Toolkit - Part 1: Guidelines, preparation and setup 44 DeploymentWcrkbench - [Deployment Workbench\DepIcyment Shares\MDT Deployment Share Systems]
File Action View Help
Delete Selected Items
Deployment Workben
Information Center
v Deployment Shares
v MDT Deployme
Applicatio
Operating
Out of-Box
Packages
Task Seque
Advanced C
Monitoring
Deletes the current selection.
Summary
Options
Progress
Confirmation
Al of the necessary details have been specified Please review the values below
Details
Click next to execute the requested action
ng Syste
pot Operating Syst..
Folder
efresh
pot List...
elete](https://www.infrastructureheroes.org/wp-content/uploads/2020/10/deploymentwcrkbench-deployment-workbench-depicy-6.png)
And again, the appropriate summary
![Network installation with the Microsoft Deployment Toolkit - Part 1: Guidelines, preparation and setup 45 DeploymentWcrkbench - [Deployment Workbench\DepIcyment Shares\MDT Deployment Share Systems]
File Action View Help
Delete Selected Items
Deployment Workben
Information Center
v Deployment Shares
v MDT Deployme
Applicatio
Operating
Out of-Box
Packages
Task Seque
Monitoring
Deletes the current selection.
Confirmation
Options
Summary
Progress
Confirmation
The process completed successfully
performing the operation "delete" on target Systems\Windows 10 Edut
Deleted Windows 10 aducation in DE Windows 10 Enterphse 2004 updated_may install
Performing the operation "delete" on target Systems\Windows 10 Edut
Deleted Windows 10 Education N in DE Windows 10 Enterprise 2004 updated_may inst
Pefomning the operation "delete" on target Systems\Windows 10 Ente
Deleted Windows 10 Enterprise N in DE Windows 10 Enterprise 2004 updated_may inst
Performing the operation "delete" on target Systems\Windows 10 Pro
Deleted Windows 10 Pro Education in DE Windows 10 Enterihse 2004 updated_may in
Performing the operation "delete" on target Systems\Windows 10 Pro
Deleted Windows 10 Pro Education N in DE Windows 10 Enterprise 2004 updated_may
Performing the operation "delete" on target Systems\Windows 10 Pro f
Deleted Windows 10 Pro for Workstations in DE Windows 10 Enterprise 2004 updated_may 2020_x64
Pefomning the operation "delete" on target Systems\Windows 10 Pro
Deleted Windows 10 Pro in DE Windows 10 Enterprise 2004 updated_may install wim
Performing the operation "delete" on target Systems\Windows 10 Pro
Deleted Windows 10 Pro N for Workstations in DE Windows 10 Enterprise 2004 updated_may 2020_x6
Performing the operation "delete" on target Systems\Windows 10 Pro
Deleted Windows 10 Pro N in DE Windows 10 Enterprise 2004 updated_may install wim
ng Syste
pot Operating Syst..
Folder
efresh
pot List...
elete
Sa ve Output
Previous
View Script
Cancel](https://www.infrastructureheroes.org/wp-content/uploads/2020/10/deploymentwcrkbench-deployment-workbench-depicy-7.png)
Already it looks a bit more organized again.
![Network installation with the Microsoft Deployment Toolkit - Part 1: Guidelines, preparation and setup 46 DeploymentWorkbench - [Deployment Workbench\DepIoyment Shares\MDT Deployment Share Systems]
File Action View Help
Deployment Workbench
Information Center
v Deployment Shares
v MDT Deployment Share
Applications
Operating Systems
Out of-Box Drivers
Packages
Task Sequences
Advanced Configuration
Monitoring
Deletes the current selection.
Windows 10 Enterprise in DE Windows 10 Enterprise 2DCu4 updated_may 2020 x64 dvd install.wim
rating Syste
Import Operating Syst...
New Folder
a
Refresh
Export List...
Help](https://www.infrastructureheroes.org/wp-content/uploads/2020/10/deploymentworkbench-deployment-workbench-depioy-2.png)
The article continues: “Network Installation with the Microsoft Deployment Toolkit – Part 2: Service Account, Drivers, Software, Base Image Considerations”

2 thoughts on “Network installation with the Microsoft Deployment Toolkit – Part 1: Guidelines, preparation and setup”
Comments are closed.