This article is part of my migration from my old Office 365 to my new Microsoft 365 Tenant. It is also about setting up Office 365, the other Microsoft 365 topics will follow later. I also have written this article intentionally so that it can also be used for setup outside of a migration scenario.
Note about the Microsoft 365 edition I use
In my case I use a “Microsoft 365 E5 Developer Edition”, this I get as MCT from Microsoft. This edition corresponds to a Microsoft 365 E5 except for the Windows Enterprise, which I have available via the MSDN subscription, and audio conferences are not included.
Choosing the right edition for you
The first step is to create a corresponding Microsoft365 or Microsoft Office365 account. If you have not yet done so, you are welcome to use the following links to do so. I receive a small provision that allows me to maintain this site and it will not cost more than ordering it directly from the Microsoft website.
Notes on license topics
I’m not a licensing expert! Also, the changes are so fast moving that it would hardly be possible to update the articles. Therefore, always ask your licensing consultant about licensing topics. All information in this article is without guarantee.
For smaller companies under 300 employees
For smaller companies, one of the Business Edition is usually the best choice. It is important to pay attention to the differences. With “Microsoft Office 365 Business” only the Microsoft Office Suite for PC and MAC for 5 installations per user and OneDrive for Business is included. The server services such as Microsoft Exchange Online, Microsoft SharePoint Online and Microsoft Teams are only included in “Microsoft Office 365 Business Premium”.
It is important to note that there is a technical limit of 300 users. Also missing are some functions that are needed for larger companies, for example in the area of compliance or security. Also, the Enterprise Editions sometimes contain the CALs for the corresponding products in your environment. This is not included in the Business Editions, but they are also cheaper. As of January 26, 2019, the Microsoft Office 365 Business Premium costs €10.50 per month without VAT in the annual subscription.
For larger companies or companies with higher requirements
For larger companies or companies with very modular requirements, it is worth having a look at the Enterprise Editions. Don’t let the name frighten you, you can also buy a single Enterprise license, there is no lower limit. But the most important advantage, there is no upper limit, as for example with Microsoft Office 365 Business or Microsoft Office 365 Business Premium.
Since there are many variants, and detailed consideration of the Enterprise Edition would be worth at least one article, here only the short form.
- Microsoft Office 365 E1: Contains only the online services, no Microsoft Office for local installation.
- Microsoft Office 365 E3: Contains the online services and Microsoft Office for local installation and on mobile phones and tablets.
- Microsoft Office 365 E5: Same as E3, plus additional security features and telephony support
Here you will find a comparison of all Microsoft Office 365 Enterprise plans.
If you only need e-mail services, it’s worth taking a look at Microsoft Exchange Online, the pure e-mail service.
A note for larger companies with Microsoft volume agreements, talk to your license partner, in most cases you can also purchase online licenses through your existing contracts. This will usually be cheaper than via the Microsoft websites.
Preparation
Important before you start the whole things are some considerations and some homework.
Authentication and logon
Microsoft Office 365 / Microsoft 365 always requires Microsoft Azure Active Directory, an identity service in the Microsoft cloud. To make it easier for the user, it makes sense to synchronize the local Active Directory to Azure AD with Single-Sign-On. This way the whole thing is transparent for the user and he does not notice that he is now in the cloud. There are various solutions for this such as ADFS, pass-true authentication or password hash synchronization. All of them have their justification and different advantages/disadvantages.
For those who like it simple and robust, and have no problems to store a hash of the password hash in the cloud, I recommend the password hash synchronization. If the authentication should be done on your own systems, then the other solutions are the right ones. It is important to note that both ADFS and Pass-True authentication require additional hardware and if these systems are not accessible on your computer, no login is possible. In other words, if you only have one data centre and it is not accessible, no one will be able to log on to Office 365. Even if the service is accessible from the Internet café or WLAN.
More on this later in the chapter “Setting up Azure AD Synchronization and Authentication”.
It is important in this topic, if you are not an expert, seek advice. There are a few pitfalls and even I do not manage to put all of them in my articles, even if I try to do so.
Thoughts on migration
Plan under which domains you want to be reachable by e-mail. If you can already be reached under this domain, plan the change. I recommend that you take a look at the article “Preparing the mail flow for the Office 365 migration“. The other articles in my Microsoft 365 migration series, of which this one is a part, may also be of interest to you. Plan the mail flow to its own phases and think about how you want to migrate existing mail before you do so.
Here are a few special cases with links for more in-depth information. A general recommendation from Microsoft for migrations can be found in the Microsoft article “Decide on a migration path“:
Have you previously worked with an Internet/hosting provider and use POP3 or IMAP? There is a guide from Microsoft for this: “Migrating IMAP mailboxes“. This includes the Google Suite.
If you have local Exchange Servers, the document “Using the minimal hybrid solution for a fast migration” will help you.
If you still have Lotus Notes in use, there is a very short support article from Microsoft “Migrating from Lotus Notes“. My recommendation from past migrations? I would take a look at the tool and use the results to find a partner who has references in this area. If you use Lotus Notes not only for mail, which should be the case for most of them, you also have to think about your other Notes applications. Most of the time they can’t be migrated easily to Microsoft SharePoint Online.
Preparing the DNS domains
Since the entries of the DNS zones are very important, it is recommended to reduce the lifetime (TTL) of certain entries or the whole zone. Why is this important? If the TTL for the MX record (MaileXchanger, mail server) refers to 7 days, it means that another mail server will continue to use the known server for 7 days before checking if anything has changed. In the worst case, this means that I have to enable parallel operation for 7 days. Or what is even worse, a typo in the change is carved in stone for 7 days.
I have seen companies that were unreachable for 7 days and were looking for help. In that case, there is nothing to do except maybe ask the mail server admins who are known to be communicating with you to clear the DNS cache on all mail servers. This is rather not an option, so please take the DNS topic seriously. I always change the TTL to 5 minutes for the migration. It is also important to note that the change of the TTL will only take effect after the old TTL has expired, so change early.
The worst TTL I have ever seen was 30 days, well, that relieves the DNS servers of the provider and makes a move more complicated… From the point of view of a customer-unfriendly hosting provider who was advertising with 7 days cancellation period…
The setup
Creating the Office 365 account
If you don’t have an Office365 account yet, you can easily create one using the links above. These are affiliate links, which means that if you take a paid subscription I will get a provision for it. The price will not change for you. But you help me to run this blog and to provide me with new content.
Please note that for verification purposes you also have to provide a credit card for a free trial version.
Adding a domain
To add a domain, first, log in to the admin interface admin.microsoft.com Here you can either use the Setup Wizard or go through the steps one by one.
I do not use the Setup Wizard in the context of the instructions. Please click on “Show all” to see the extended menu.
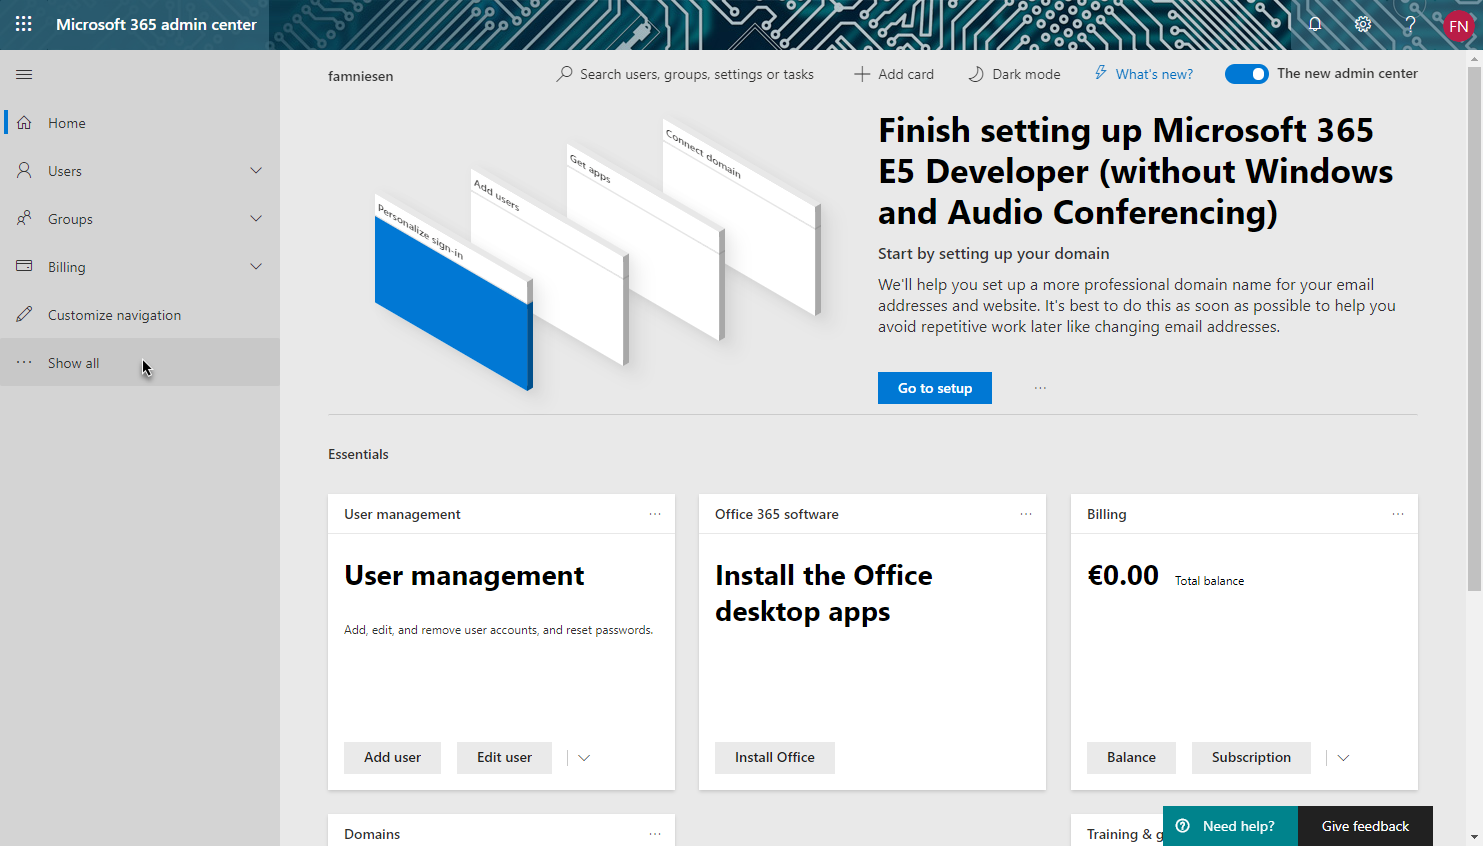
Under the setup menu, you will find the menu item “Domains”, here you can see all domains with their status. Since I have already started with parts of the migration, here are already some domains. Start the assistant for adding with a click on “Add Domain”

Add the domain name you want to use with Office365.
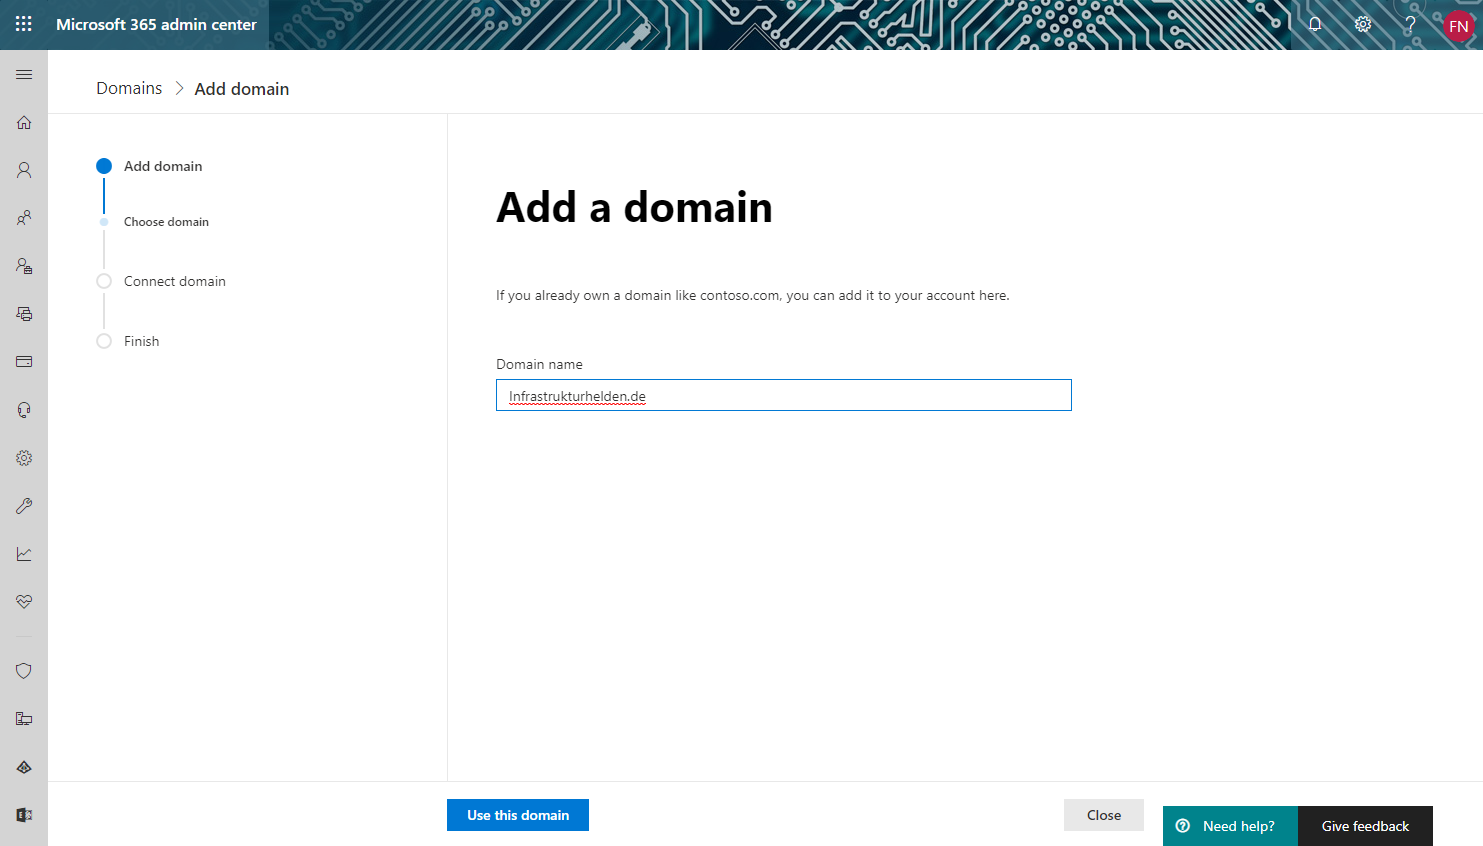
Now it is a matter of confirming ownership to Microsoft. This is done through a DNS record. I personally always recommend a TXT record, because I think the MX method with an intentional wrong entry is the wrong approach. This entry must now be entered in the DNS at your domain hoster.
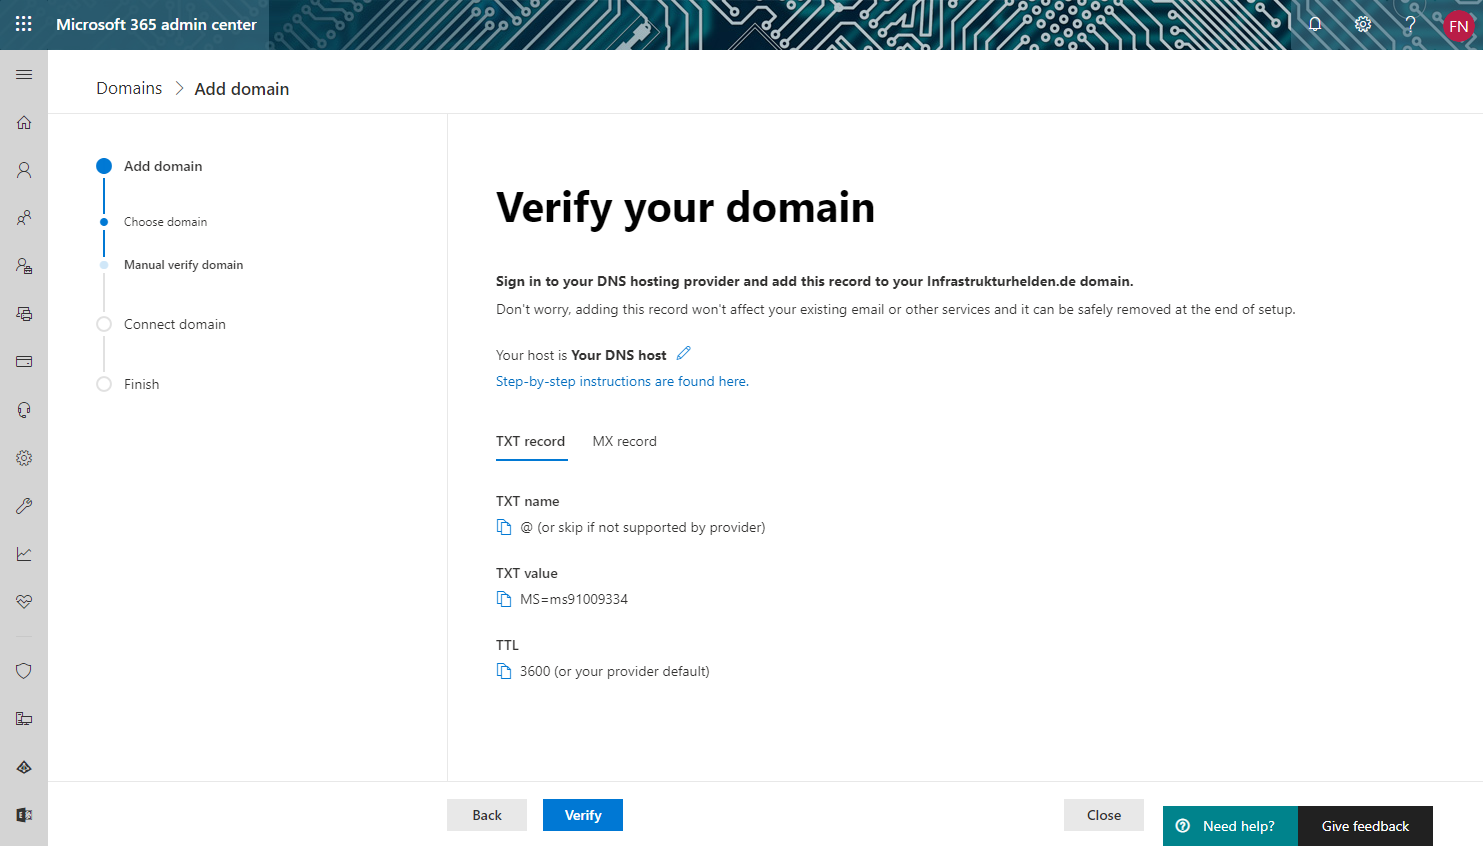
Do not yet click on “Verify” directly, but change the DNS entries first.
Since I host my pages and domain myself, I go to the administrator interface of my website administration.
![Setting up Office 365 Part 1 9 plesk
6ö Start
H osting-Se rvices
o Kunden
Domains
Abonnements
CD Service-Pakete
Links zu zusätzlichen Services
Scheduled Backups List
E?] Prozessliste
G Google Authenticator
IR so Toolkit
O ImuniWAV
Serververwaltung
Tools & Einstellungen
WordPress
a O Erweiterungen
Q Advanced Monitoring
Mein Profil
Profil & Einstellungen
40 Passwort ändem
@ Ansicht ändem
Q Suchen...
Start > Domains > infrastrukturhelden.de > DNS >
Ressourceneintrag zur Zone hinzufügen
Fabian Niesen v
Eintragstyp
Domainname
TXT-Eintrag
* Erforderliche Felder
OK
.infrastrukturhelden.de.
Abbrechen
plesk.com
Fan auf Facebook warden
Folgen Sie@Plesk
Feedback geben
Feature vorschlagen](https://www.infrastructureheroes.org/wp-content/uploads/2020/02/plesk-6o-start-h-osting-se-rvices-o-kunden-dom.png)
Give the DNS server some time to replicate, it’ a good time for a coffee. I like to test beforehand with a public DNS resolver if the change is active, for example with the web-based Heise DNS Tools. If the entries are visible, click on “Verify” in the Microsoft Admin Portal. If you are reading this step in the article series on migration between 2 Office 365 environments, this step will fail because your domain is still in the old environment.
After the verification, additional DNS entries must be added. To do this, click “Continue”.
Depending on which services you want to use, you will need to add different entries.
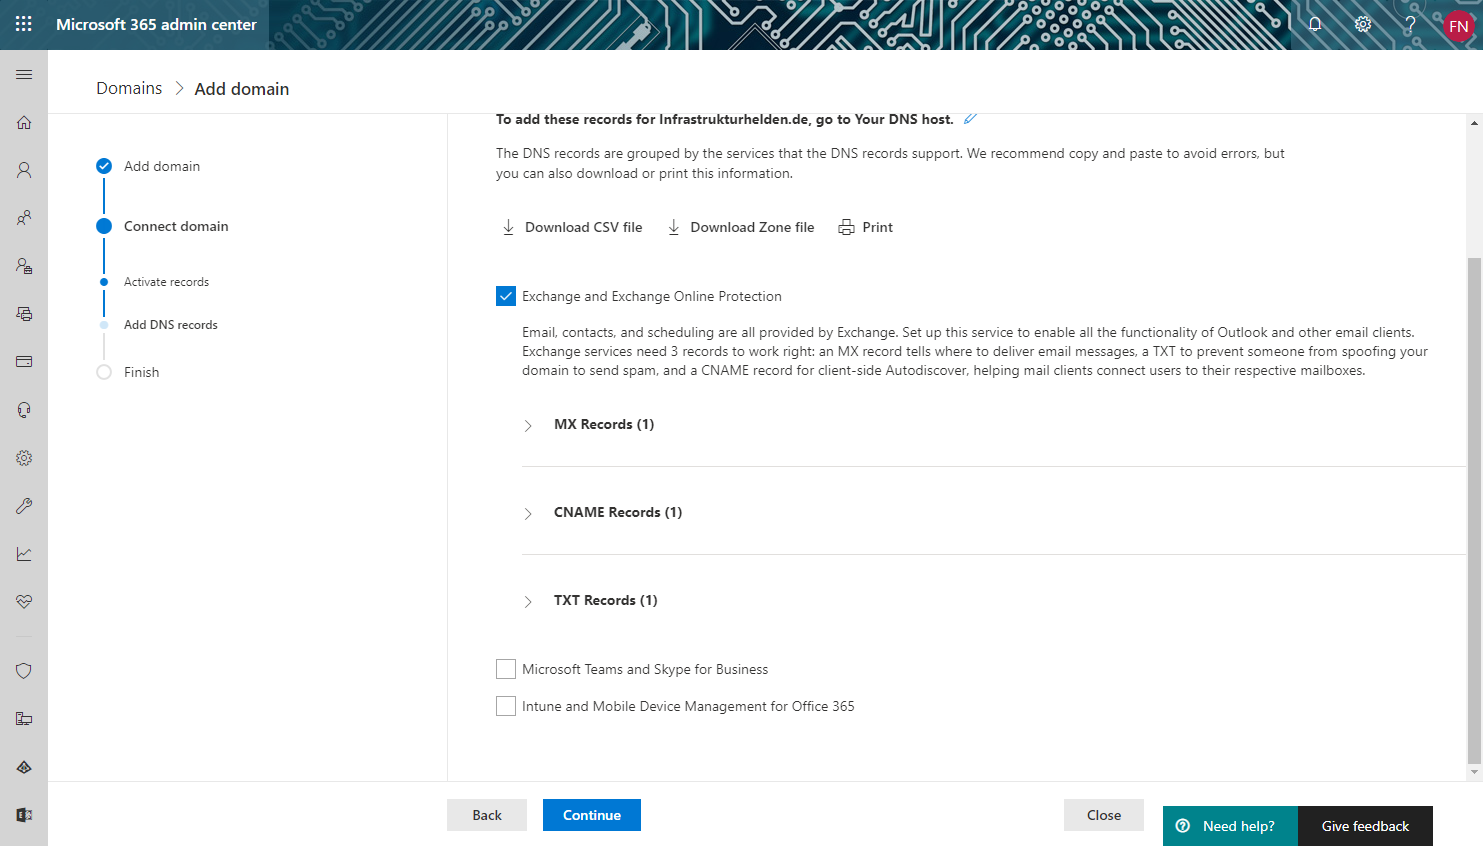
- MS Exchange Online: MX: 1 – CNAME: 1 – TXT: 1
- MS Teams and Skype for Business: CNAME: 2 – SRV: 2
- MS Intune and MDM for Office365: CNAME: 2
These entries are also checked in the next step. Also here you have to think about the short waiting time. For me, coffee consumption always increases with such a procedure. Since the Azure-DNS service is used for InfrastrukturHelden.de / InfrastructureHeroes.org, the transmission from my webserver to Azure will always take a little longer. But the Azure DNS is much faster with the answers. If you click too early, the length of the next pause is the TTL duration.
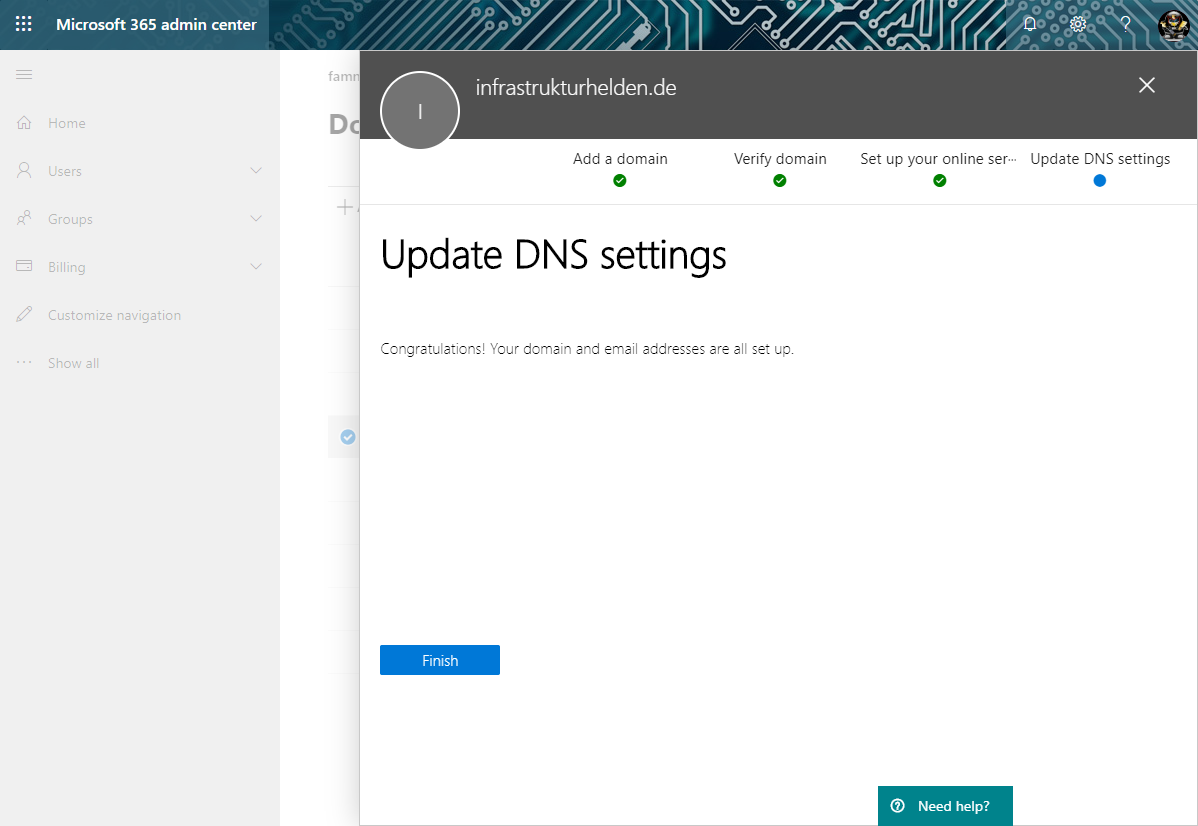
Now the domain can be used for the purposes set up
The next part “Setting up Office 365 Part 2” continues with the topics “Setting up Azure AD Synchronisation and Authentication”, PTA, PHS, ADFS, SSO and MFA explained in a simple and understandable way. Besides the explanation, I also show how to configure it. Also not to forget the customization of the password request, the corporate branding.

